
Main Courses
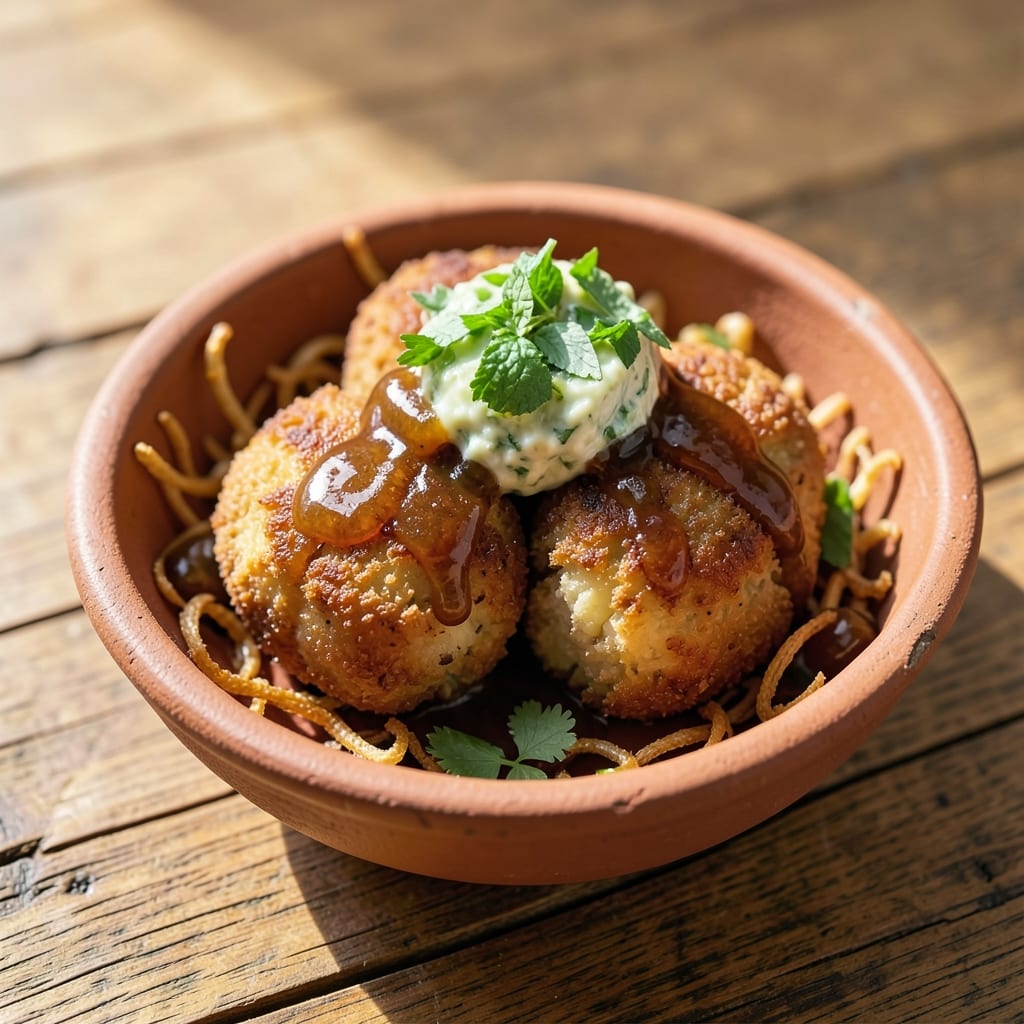
Aloo tikki with rice flour delivers the perfect balance of crispy, golden edges and tender, spiced potato centers—crispy bites that stay crunchy even after serving. The secret lies in rice flour's ability to create that signature texture without overshadowing the masala flavors. I've perfected this recipe through countless batches, ensuring every tikki holds together while achieving that restaurant-quality crunch.
This version stays true to tradition while adapting for home kitchens. The potato mixture gets its structure from rice flour (not chickpea flour), creating a lighter, crispier tikki that's easier to shape and pan-fry. Spice levels are adjustable—mild for beginners, fiery for enthusiasts—but the technique remains consistent: gentle pressing, even heat, and patience for that golden crust.
What you'll end up with are crispy-golden aloo tikki that maintain their crunch even after being served with cooling mint chutney or tangy tamarind sauce. The exterior shatters slightly with each bite, revealing tender, spiced potato centers infused with cumin, coriander, and garam masala. These are the kind of bites that disappear quickly at parties or become a favorite weeknight snack.
Serve with tamarind chutney for the full experience, or pair with yogurt-based raita for a refreshing contrast. The recipe scales perfectly for gatherings—just double the batter and fry in batches. Here's how to make them right the first time.
Ingredients for aloo tikki recipe with rice flour
Rice flour and mashed potatoes create the perfect crispy-tender aloo tikki base—golden edges that stay crunchy.
| Ingredient | Amount | Notes |
|---|---|---|
| Russet Potatoes 🥔 | 2 ½ lb | Peeled, boiled, mashed smooth |
| Rice Flour 🌾 | ½ cup | Fine grind for crispiness |
| Green Chilies 🌶️ | 4 whole | Fresh, finely chopped |
| Cumin Seeds 🌿 | ½ tsp | Toasted, freshly ground |
| Garam Masala 🌶️ | 1 tsp | Freshly ground preferred |
| Ground Cumin 🌿 | ½ tsp | For extra depth |
| Red Chili Powder 🌶️ | ½ tsp | Adjust for heat preference |
| Salt 🧂 | ¾ tsp | Diamond Crystal preferred |
| Fresh Coriander Leaves 🌿 | ¼ cup | Chopped, for garnish |
| Vegetable Oil 🫒 | ½ cup | High smoke point preferred |
| Lemon Juice 🍋 | 1 tbsp | Freshly squeezed |
| Yogurt 🥛 | ¼ cup | Plain, unsweetened |
| Ginger Garlic Paste 🧄 | 1 tbsp | Homemade preferred |
The rice flour is non-negotiable—it's what gives these tikki their signature crispiness. Bob's Red Mill or Whole Foods brand work perfectly, but avoid pre-cooked rice flour. For the potatoes, Russets are ideal—they mash smoother than Yukon Golds. If you can't find fresh green chilies, substitute with 1 tsp red chili powder plus 1 tbsp water for a similar kick. The yogurt adds moisture to the mix, so don't skip it—even if you're not using it for serving.
No rice flour? Semolina (sooji) works in a pinch, but the texture will be slightly denser. Fresh coriander is ideal, but dried coriander at half the amount works if you're in a hurry. For the ginger garlic paste, homemade is best—just blend 1 tbsp each of fresh ginger and garlic with 1 tsp oil. If you can't find garam masala, mix 1/4 tsp each of cinnamon, cardamom, cloves, and black pepper. The oil quantity is flexible—add more if needed for frying, but don't exceed 1/2 cup total.
Store the prepared potato mixture in an airtight container in the fridge for up to 2 days. The tikki themselves keep their crispiness for about 1 hour after frying, so serve immediately or reheat in a dry pan for 1-2 minutes. For parties, fry in batches and keep warm in a 200°F oven on a wire rack. The rice flour mixture can be prepped ahead and refrigerated, saving you time when guests arrive.
Why You'll Love This Recipe
- No Chopping Nightmares: I swear by this—just boil, mash, and mix. No fancy dice work or julienne skills required. The rice flour binds everything together like magic, so even if my potatoes are lumpy, the tikki still holds its shape.
- Crispy-Creamy Magic: That rice flour crust? Chef’s kiss. It’s got a satisfying crunch on the outside while staying soft inside—plus, the cumin and garam masala give it this warm, earthy kick that makes it taste like a street cart in Delhi.
- Picnic-Proof Perfection: Between us, these are my go-to for lunchboxes or tailgates. They travel well (no soggy tikkis here), and the green chilies add just enough heat to keep things interesting without being overpowering.
- Budget Bulk Winner: A single bag of potatoes and rice flour stretches for weeks—I’ve made 20 of these for $5. Reheat leftovers in a pan or air fryer, and they’re just as good the second time around. (Yes, even on a Tuesday night.)
Step-by-step instructions for crispy-golden aloo tikki
Here's how to create perfectly crispy aloo tikki with a golden exterior and tender interior.
👨🍳 Step 1: Prepare the Potato Mixture
Start by boiling the 2.5 lb Russet Potatoes until fork-tender, about 15-20 minutes. Drain immediately and let them cool slightly before peeling. Once cool enough to handle, mash them smoothly using a potato masher or ricer—no lumps should remain. This texture is crucial for crispy tikki.
In a large bowl, combine the mashed potatoes with the 0.25 cup Yogurt, 1 tbsp Ginger Garlic Paste, 0.5 tsp Ground Cumin, 0.5 tsp Red Chili Powder, 0.75 tsp Salt, and 4 whole Green Chilies (finely chopped). Mix thoroughly until all ingredients are evenly distributed. The yogurt helps bind the mixture while adding moisture for a tender center.
👨🍳 Step 2: Toast Spices and Mix with Rice Flour
In a small dry pan, toast the 0.5 tsp Cumin Seeds over medium heat for 30 seconds until fragrant. Immediately transfer to a bowl and let cool. Add these to your potato mixture along with the 1 tsp Garam Masala and 0.25 cup Fresh Coriander Leaves (chopped). Mix well to incorporate all flavors.
Gradually fold in the 0.5 cup Rice Flour using a spatula. The rice flour is key for achieving that signature crunch—it absorbs moisture and creates a crispy crust. Mix just until combined; overmixing will make the mixture tough. The dough should hold together when pressed but still be slightly sticky. If too dry, add 1 tsp water at a time until it reaches the right consistency.
🔥 Step 3: Shape and Chill the Tikki
Divide the mixture into 4 equal portions (about 6 oz each). On a lightly floured surface, gently shape each portion into a 1-inch thick patty with a 3-inch diameter. Press firmly but don't overwork the dough—this prevents the tikki from becoming dense. Use your hands to create a slight indentation in the center for even cooking.
Place the shaped tikki on a plate and refrigerate for 30 minutes. Chilling firms up the mixture, making it easier to handle and ensuring the tikki hold their shape during frying. This step also helps maintain crispiness by reducing excess moisture in the dough.
🍳 Step 4: Fry to Golden Perfection
Heat 0.25 cup Vegetable Oil in a medium skillet over medium-high heat until shimmering but not smoking. Add 2 tikki at a time (don't overcrowd the pan) and fry for 4-5 minutes per side until they turn a deep golden brown color. The oil should sizzle gently—if it burns, reduce the heat slightly.
During frying, press down lightly on each tikki with a spatula for the first 30 seconds to help them maintain shape. They're done when the exterior is crispy and the internal temperature reaches 160°F (test with an instant-read thermometer). Transfer to a paper towel-lined plate to drain excess oil.
🍽️ Step 5: Serve with Fresh Garnish
While still warm, drizzle the fried tikki with 1 tbsp Lemon Juice and sprinkle generously with the remaining 0.25 cup Fresh Coriander Leaves (chopped). The lemon juice brightens the flavors while the coriander adds a fresh contrast to the rich, spiced tikki. Serve immediately with mint chutney or tamarind sauce for dipping.
For best results, eat these within 10 minutes of frying while they're at their crispiest. The combination of tender potato center and crispy exterior makes each bite irresistible. Store any leftovers in an airtight container, but know they won't be as crispy when reheated.
Pro Tips For Making Aloo Tikki Recipe With Rice Flour
- Dry the potatoes thoroughly: After boiling, mash the potatoes and spread them on a clean kitchen towel. Press gently to squeeze out all moisture—wet potatoes make the batter sticky and the tikki fall apart when frying. I learned this the hard way after watching my first batch disintegrate in the pan.
- Use medium heat for frying: Too hot, and the outside burns before the inside cooks; too low, and you’ll end up with greasy, soggy tikki. Keep the oil at a steady simmer—drop in a small piece of potato and if it sizzles but doesn’t smoke excessively, you’re golden. (Yes, even if you’re impatient like me.)
- Grind green chilies with cumin: Pulse the green chilies and cumin seeds together in the grinder first—this distributes their oils evenly into the batter, giving the tikki a deeper, nuttier flavor. Skipping this step means your tikki will taste like two separate ingredients instead of one cohesive bite.
- Rest the batter 10 minutes: Mix the rice flour with the potato mash, then let it sit covered for at least 10 minutes. This gives the flour time to absorb moisture and bind properly, so your tikki holds its shape and doesn’t crumble when you flip it. (Your future self will thank you.)
Pro cooking tips for this dish
Rice Flour Magic
The rice flour isn't just an ingredient—it's the secret weapon for that signature crispy exterior. Unlike traditional chickpea flour (besan), rice flour creates a lighter, airier texture that stays crispy longer. I recommend Bob's Red Mill or Whole Foods brand for the finest grind—avoid pre-cooked rice flour, which lacks the necessary starch for crispiness. The key is mixing it gently with the potato base just until combined; overmixing develops gluten and makes the tikki dense. 🌾
Potato Prep Matters
Russet potatoes are non-negotiable here—their high starch content creates the ideal mash for crispy tikki. Boil them until fork-tender (15-20 minutes), then drain immediately and let cool slightly before peeling. The cooling step prevents excess moisture in your mixture, which can lead to soggy tikki. I use a potato ricer for ultra-smooth texture, but a masher works too—just press out all lumps. The smoother the mash, the better the final texture.
Spice Toasting Technique
Never skip toasting your cumin seeds—this releases their aromatic oils, which are essential for flavor. Toast them in a dry pan over medium heat for just 30 seconds until fragrant, then cool completely before adding to the mixture. I've learned the hard way that adding hot spices directly to the dough can make the mixture too warm, causing the rice flour to lose its crispiness. Let them cool for at least 5 minutes before mixing. 🌿
Perfect Frying Heat
The oil temperature is everything—too hot and your tikki burn on the outside before cooking through; too cool and they'll be greasy. Heat 0.25 cup vegetable oil until it shimmers but doesn't smoke (350°F is ideal). Use a medium skillet (8-inch) and fry 2 tikki at a time—overcrowding lowers the oil temperature. Press down lightly with a spatula for the first 30 seconds to help them maintain shape, then let them cook undisturbed. They're done when golden brown and reaching 160°F internally.
Chill Before Frying
This is one of those "don't skip it" steps that makes all the difference. Chilling the shaped tikki for 30 minutes firms up the rice flour structure, preventing them from falling apart during frying. I place them on a plate in the fridge, which also helps them hold their shape better when you press them down in the oil. Pro tip: Use a lightly floured surface when shaping to prevent sticking, but don't over-flour or your tikki will lose crispiness.
Lemon Juice Finish
The final drizzle of lemon juice isn't just for flavor—it helps set the rice flour crust. The acid reacts with the starches, creating a slightly firmer exterior that stays crispy longer. I like to add it right after frying while the tikki are still hot. Fresh coriander leaves add a bright contrast to the rich, spiced potato. For extra crunch, sprinkle with toasted cumin seeds right before serving. This finishing touch elevates the dish from good to restaurant-quality. 🍋
Nutrition facts
Frequently asked questions
Why does rice flour make these tikki crispier than chickpea flour?
Rice flour creates a lighter, airier crust that stays crispy longer because it absorbs moisture differently than chickpea flour. The fine particles form a delicate network that browns beautifully while maintaining a shatterable texture. Chickpea flour (besan) makes denser tikki that crisp up but lose their crunch faster.
Can I make aloo tikki ahead of time?
You can prep the potato mixture up to 2 days ahead and store it in an airtight container in the fridge. However, shape and fry the tikki just before serving—they lose crispiness within 1 hour of frying. For parties, keep fried tikki warm in a 200°F oven on a wire rack to maintain texture.
What's the best way to adjust the spice level?
For milder tikki, reduce the red chili powder to 0.25 tsp and omit fresh green chilies. For extra heat, add 1 tsp cayenne pepper or 2 extra green chilies. Always toast your spices first to enhance their flavor without adding more heat. The yogurt in the mix also helps balance spice levels.
Why did my tikki turn out greasy?
Greasy tikki usually means the oil was too cool or the mixture contained too much moisture. Ensure your oil is at 350°F (shimmering but not smoking) and fry 2 at a time without overcrowding. Also verify your potato mash is completely dry before mixing with rice flour—excess moisture prevents proper crisping. Press down gently during the first 30 seconds of frying to help release moisture.
What's the best way to reheat leftover tikki?
For best results, reheat in a dry skillet over medium heat for 1-2 minutes per side until crispy again. Microwaving will make them soggy. If using an oven, place on a wire rack at 375°F for 5-7 minutes to restore some crispiness. Remember, leftovers won't be as crispy as fresh ones, but this method helps maintain texture.