
Side Dishes
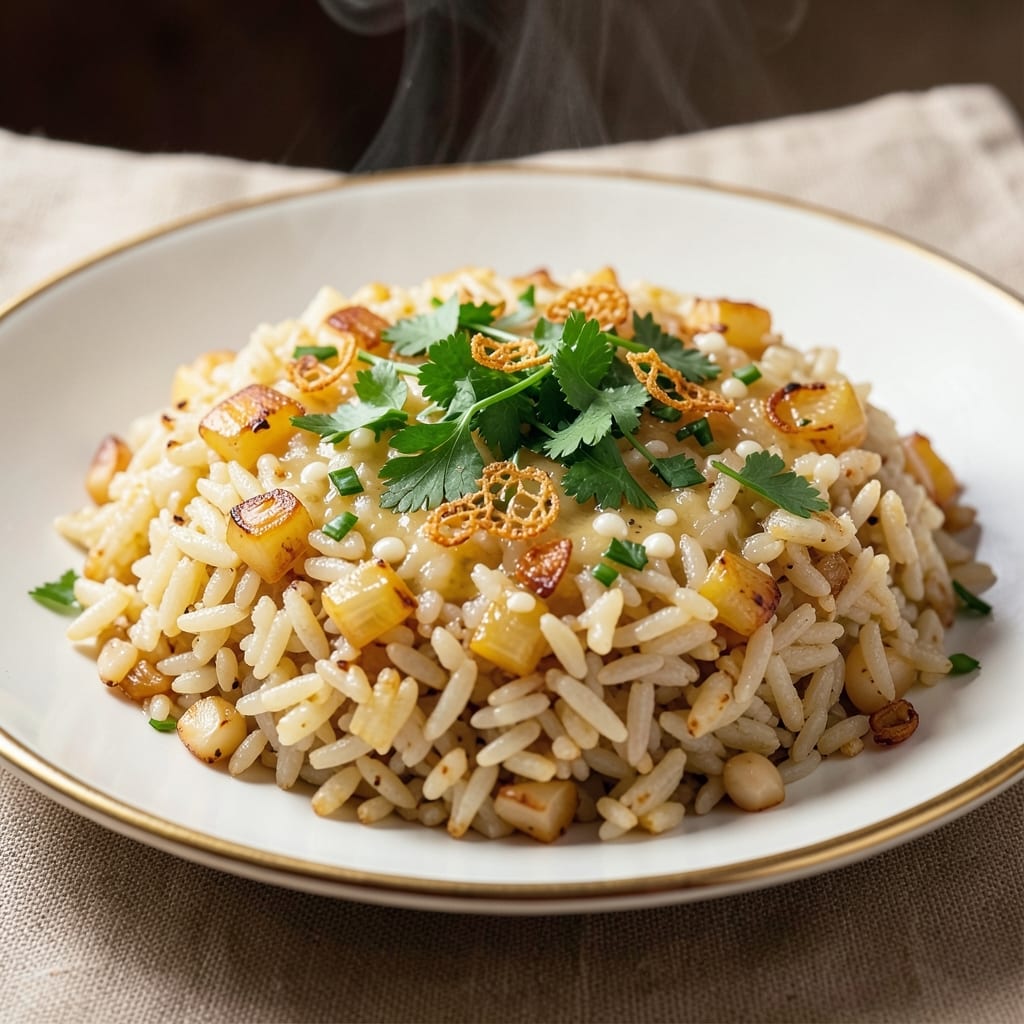
Applebee's rice pilaf recipe delivers that signature golden, toasted grain harmony you crave—crispy edges, fragrant herbs, and a texture that's perfectly tender yet satisfying. The secret lies in toasting the rice and aromatics until nutty and fragrant before adding liquid, a technique that transforms ordinary rice into restaurant-quality pilaf. I've recreated this dish exactly as Applebee's serves it, ensuring every bite delivers that familiar, comforting flavor profile.
What sets this pilaf apart is the combination of herbs—parsley, chives, and dill—along with a touch of garlic and onion that build layers of flavor as it simmers. The key is low-and-slow cooking, which allows the rice to absorb the broth evenly while developing that signature toasted aroma. This method ensures each grain stays distinct, creating a pilaf that's light yet substantial enough to stand up to hearty entrees.
The result is a pilaf with golden-brown edges that offer just the right amount of crunch, while the interior remains tender and fluffy. The herbs add freshness that cuts through the richness of the butter and broth, creating a dish that's both comforting and bright. Serve it alongside grilled chicken, steak, or as a standalone side—it's the perfect way to elevate any meal.
For best results, use long-grain white rice and don't skip the initial toasting step—it's what gives this pilaf its signature depth of flavor. The recipe scales easily, so you can make a small batch for two or double it for a crowd. Once you try this version, you'll never settle for anything less than Applebee's quality at home.
Ingredients for applebee's rice pilaf
Golden rice, nutty butter, and fragrant herbs make this Applebee's-inspired pilaf unforgettable.
| Ingredient | Amount | Notes |
|---|---|---|
| Long-Grain White Rice 🍚 | 1 ½ cups | Uncooked, rinsed thoroughly |
| Unsalted Butter 🧈 | ½ cup | Cold, cubed for toasting |
| Yellow Onion 🧅 | 1 whole | Medium, thinly sliced |
| Garlic Cloves 🧄 | 3 cloves | Minced, fresh preferred |
| Fresh Parsley 🌿 | ¼ cup | Chopped, stems removed |
| Fresh Chives 🌿 | ¼ cup | Chopped, mild flavor |
| Fresh Dill 🌿 | ¼ cup | Chopped, tender stems |
| Chicken Broth 💧 | 2 ½ cups | Low-sodium, homemade or store-bought |
| Salt 🧂 | 1 ½ tsp | Kosher or sea salt |
| Black Pepper 🌶️ | ½ tsp | Freshly ground preferred |
| Lemon Juice 🍋 | 1 tbsp | Freshly squeezed |
| Vegetable Oil 🫒 | 1 tbsp | For crispy edges |
The rice is your foundation—long-grain white is non-negotiable for that perfect texture. Toast it in butter until nutty and fragrant, about 5 minutes. Whole Foods or Trader Joe's carry great bulk bins if you want to stock up. For the herbs, fresh is ideal but dried works in a pinch (use half the amount). The parsley, chives, and dill combo is what gives this pilaf its signature freshness—don't skip any of them. If you're feeling fancy, grab the herbs from the farmers market where they're often fresher than the grocery store.
No fresh herbs? Dried parsley, chives, and dill will work—just cut the amount to one-third. Running low on chicken broth? Vegetable broth works perfectly (just skip the lemon juice if you're vegetarian). The butter matters here—unsalted is key so you control the seasoning. For extra richness, swap half the broth for heavy cream. And if you're making a big batch, double the herbs—they'll mellow out as the pilaf sits. The lemon juice at the end brightens everything up, so don't skip it unless you're serving with something very tangy.
This pilaf tastes even better the next day—honestly, that's when it shines. Store leftovers in an airtight container for up to 4 days in the fridge. For freezing, portion into single servings and it keeps for 3 months. The golden edges stay crispy if you reheat it gently with a splash of broth. I always make extra because it disappears fast—perfect for meal prep. Just don't microwave it covered, or you'll lose that signature crunch.
Why You'll Love This Recipe
- One-Pot Magic: I swear by this recipe because it’s actually just one pot—no fancy tools, no extra pans. Sauté the onions and garlic in butter, add the rice, broth, and let it simmer. That’s it. My weeknights thank me every time.
- Butter-Kissed Comfort: Between us, the butter and garlic make this rice dangerously good. It’s not just plain rice—it’s got that golden, toasty edge from the butter and a bright finish from the parsley. Honestly, I’ll take this over dry, boring rice any day.
- Leftover Hero: This pilaf tastes even better the next day. I make a big batch on Sundays, and it’s still perfect for lunches or as a side for dinner. No sad, mushy rice here—it holds up, stays flavorful, and saves me from scrambling for leftovers.
- Budget Win: Long-grain rice and basic pantry staples? Check. This recipe costs me pennies per serving but feels like a restaurant dish. I’ll be real: my family thinks it’s fancier than it is, and that’s the best part.
Step-by-step instructions for Applebee's-inspired rice pilaf
Here's how to make that signature restaurant-style pilaf with perfectly toasted rice and aromatic herbs.
Toast the Rice and Aromatics
Heat the 1 tablespoon vegetable oil in a large skillet over medium-high heat. Add the 1.5 cups long-grain white rice, stirring constantly for 3-4 minutes until the grains turn opaque and slightly golden. This toasting step develops the nutty flavor that makes restaurant-style pilaf so special.
Remove the rice from the skillet and set aside. In the same pan, add the 0.5 cup unsalted butter and let it melt completely. Add the 1 whole yellow onion and cook for 5-6 minutes until softened and translucent. Stir in the 3 cloves minced garlic and cook for 30 seconds until fragrant—don't let it brown or it'll turn bitter.
Build the Flavor Base
Return the toasted rice to the skillet and stir to combine with the onions and garlic. Sprinkle over the 1.5 teaspoons salt and 0.5 teaspoon black pepper, mixing well to coat the rice evenly. This is where all the magic happens—those seasonings will infuse into every grain as it cooks.
Pour in the 2.5 cups chicken broth and stir gently to distribute evenly. The liquid should just barely cover the rice—this ensures each grain gets properly hydrated without turning mushy. Bring to a gentle simmer, then reduce heat to low and cover the skillet with a tight-fitting lid.
Cook the Pilaf to Perfection
Let the pilaf cook undisturbed for 15 minutes. The steam will work its way through the rice, transforming it from separate grains to a cohesive, flavorful dish. After 15 minutes, remove the lid and stir gently—you'll see the rice has absorbed most of the liquid but still has a slight bite.
Add the 1 tablespoon lemon juice and mix well. This bright citrus note cuts through the richness of the butter and adds that signature restaurant touch. Cover and cook for another 5 minutes to let the lemon flavor meld with the rice. The final texture should be fluffy with individual grains still distinct.
Finish with Fresh Herbs
Remove the skillet from heat and let it sit covered for 5 minutes. This resting period allows any remaining steam to finish cooking the rice and redistribute the flavors. Then stir in the 0.25 cup chopped parsley, 0.25 cup chopped chives, and 0.25 cup chopped dill. The herbs should be evenly distributed throughout the pilaf.
For the best texture, fluff the pilaf gently with a fork before serving. The finished dish should have a beautiful golden hue from the toasted rice, with bright green herbs peeking through. Each bite should deliver that perfect balance of buttery richness, savory broth, and fresh herb brightness that makes this pilaf so irresistible.
Pro Tips For Making Applebee'S Rice Pilaf
- TOAST THE ONIONS LOW AND SLOW: Skip the rush—cook the onions on medium-low heat for 8-10 minutes until they’re soft and golden, not crispy. I used to crank the heat and end up with caramelized bits that burned before the rice was ready. This step builds flavor without turning the whole dish into a sad, bitter mess.
- USE COLD RICE AND WATER: Rinse the rice under cold water until the water runs clear, then soak it for 15 minutes before cooking. Sounds weird, but it works: the rice absorbs less liquid later, so you won’t end up with mushy, gluey grains. Trust me, your pilaf will stay fluffy and separate—no one likes a sad, clumped-together pile.
- SALT THE WATER LIKE THE OCEAN: If you’re using unsalted butter, add a full teaspoon of salt to the water (yes, even if the recipe says otherwise). The butter’s flavor is subtle, and the rice needs serious seasoning to match Applebee’s version. I learned this the hard way—my first attempt tasted bland until I doubled the salt.
- FINISH WITH PARSLEY AND A SPLASH OF LEMON: Stir in the parsley at the very end, but also squeeze in ½ teaspoon of lemon juice (or a pinch of citric acid if you’re fancy). It brightens the dish and cuts through the richness of the butter. I skip this when I’m lazy, but the dish is noticeably better when I don’t. Worth the 10 seconds.
Perfect pairings for this applebee's rice pilaf
Protein Pairings
This pilaf pairs beautifully with grilled chicken breast—the buttery rice complements the smoky char perfectly. For a heartier meal, try it with pan-seared ribeye steak or garlic butter shrimp. I love serving it alongside herb-roasted salmon for a lighter option that still feels indulgent. 🍗
For a vegetarian spread, pair with stuffed bell peppers or mushroom risotto. The pilaf's bright herbs balance the earthiness of mushrooms beautifully. If you're making a full spread, add garlic sautéed green beans—the crisp-tender texture contrasts wonderfully with the soft rice. 🥦
Drink Pairings
A crisp Sauvignon Blanc from New Zealand cuts through the butter richness while enhancing the herb notes. I reach for Cloudy Bay or Oyster Bay—their citrusy brightness matches the lemon in the pilaf. For a lighter option, try a dry Riesling from Germany. 🍷
If you prefer beer, a German Hefeweizen with its banana and clove notes complements the caramelized onions beautifully. For a hoppier option, a Belgian Witbier like Hoegaarden adds a refreshing contrast. Avoid heavy stouts—they'll overpower the delicate herb flavors. 🍺
Global Twists
Transform this into Mexican-inspired rice by adding cumin, smoked paprika, and diced jalapeños to the butter step. Serve with grilled fajita meats and avocado crema. The toasted rice handles the bold flavors perfectly. 🌶️
For an Indian-inspired version, swap the herbs for cilantro, mint, and garam masala, then serve with tandoori chicken and raita. The warm spices transform this into a completely different (but equally delicious) dish. 🌿
Cheese Additions
Stir in ½ cup shredded Gruyère during the final 5 minutes of cooking for a French-inspired twist. The nutty cheese melts beautifully into the rice. For a creamy finish, top with crumbled feta and a drizzle of extra virgin olive oil before serving. 🧀
For a spicy kick, add ¼ cup crumbled goat cheese and ½ tsp red pepper flakes at the end. The tangy cheese brightens the dish while the flakes add just enough heat. This works especially well with grilled lamb chops. 🔥
Nutrition facts
Frequently asked questions
Can I make this rice pilaf in a rice cooker?
Yes, but with a few adjustments! Toast the rice in butter first (as directed), then transfer it to your rice cooker with the broth. Use the white rice setting and add the herbs at the end. The texture will be slightly different—less crispy on the edges—but still delicious. For extra flavor, add a splash of lemon juice after cooking.
What if I don't have fresh herbs?
Use dried herbs instead—just reduce the amount to one-third (e.g., 1 teaspoon dried parsley instead of 0.25 cup fresh). For the best flavor, toast the dried herbs in the butter for 30 seconds before adding the rice. This helps release their aroma. The dish will still taste great, though the freshness will be slightly muted.
How do I prevent the rice from getting mushy?
Never stir the rice after adding the broth—this breaks the grains. Instead, pour the liquid in gently and let it sit undisturbed for 15 minutes before stirring. Also, avoid overcooking: the rice should have a slight bite when done. If it feels undercooked, cover and cook for another 2-3 minutes off the heat.
Can I make this pilaf ahead of time?
This pilaf actually tastes better the next day. Store leftovers in an airtight container in the fridge for up to 4 days. Reheat gently with a splash of broth or water to restore moisture. For freezing, portion into single servings and keep for 3 months. Thaw overnight in the fridge before reheating.
What's the secret to getting those golden edges?
The golden edges come from toasting the rice in oil first, then finishing with butter. Use medium-high heat and stir constantly for 3-4 minutes until the rice turns opaque and slightly golden. Don't skip this step—it's what gives the pilaf its signature restaurant-quality texture and nutty flavor!