
Main Courses
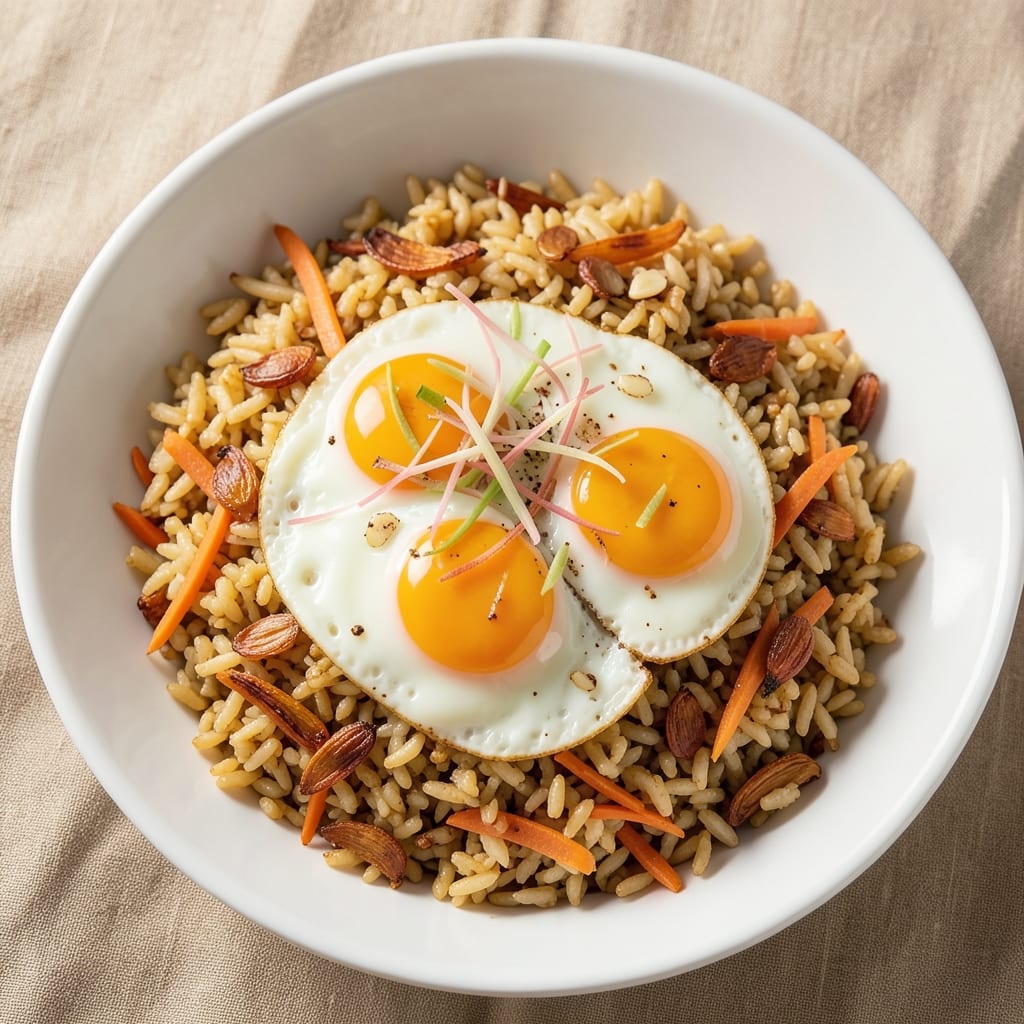
Arborio fried rice recipe transforms leftover risotto rice into a wok-tossed masterpiece with crispy edges and layers of umami flavor. The secret lies in perfectly toasted rice—slightly sticky but not mushy—paired with a quick stir-fry technique that builds depth through charred aromatics and savory seasonings. I developed this method after realizing how versatile arborio rice could be beyond its risotto fame, delivering a dish that's both restaurant-worthy and ready in 20 minutes.
What sets this recipe apart is the balance of textures: crispy rice edges from high-heat wok tossing, tender protein (or vegetables), and crunchy toppings like fried shallots or sesame seeds. The umami foundation comes from soy sauce, fish sauce, and a touch of oyster sauce—classic fried rice flavors that create addictive depth. Unlike traditional fried rice, arborio's slightly chewy texture holds up beautifully to the wok's motion while absorbing flavors without turning soggy.
The result is a dish that's vibrant, aromatic, and packed with restaurant-quality flavor—golden brown in spots, fragrant with garlic and ginger, and perfectly seasoned with each bite offering a mix of savory, slightly sweet, and umami notes. The technique is simple but requires attention to timing and heat control to achieve that signature wok-hei (breath of the wok) that makes every bite irresistible.
Customize it with your favorite proteins—shrimp, chicken, or tofu—or keep it vegetarian with extra vegetables and mushrooms. The recipe scales effortlessly for weeknight dinners or meal prep, making it the ultimate versatile dish for any occasion. Let's get cooking!
Ingredients for arborio fried rice
Perfectly toasted arborio rice meets wok-hei technique for restaurant-quality fried rice in minutes.
| Ingredient | Amount | Notes |
|---|---|---|
| Day-Old Arborio Rice 🍚 | 3 cups | Cooled completely, slightly sticky |
| High-Oleic Vegetable Oil 🫒 | ¼ cup | Smoke point 450°F+ preferred |
| Garlic Cloves 🧄 | 6 cloves | Thinly sliced, skin-on for aroma |
| Fresh Ginger 🌿 | 1 ½ tbsp | Finely minced, peeled |
| Large Eggs 🥚 | 2 whole | Freshly beaten, room temperature |
| Carrots 🥕 | 1 cup | Finely diced, small pieces |
| Green Onions 🧅 | ½ cup | White and green parts, sliced |
| Low-Sodium Soy Sauce 🥢 | 3 tbsp | Kikkoman preferred for balance |
| Fish Sauce 🍶 | 1 tbsp | Red Boat brand recommended |
| Oyster Sauce 🍜 | 1 ½ tbsp | Lee Kum Kee for authenticity |
| Sesame Oil 🫒 | 1 tsp | Toasted, for finishing |
| Toasted Sesame Seeds 🌾 | 1 tbsp | For garnish, store-bought okay |
| Diamond Crystal Kosher Salt 🧂 | ½ tsp | Adjust to taste, not added salt |
| Ground White Pepper 🌶️ | ¼ tsp | Freshly ground preferred |
| Optional Protein 🍗 | 1 cup | Diced chicken, shrimp, or tofu |
The rice is non-negotiable—day-old arborio with its chewy texture absorbs flavors without turning mushy. Costco or Whole Foods carry high-quality arborio in bulk, but any risotto rice works. For the oil, Avocado Brand or Mazola high-oleic oils have the perfect smoke point. Garlic and ginger should be freshly minced—pre-minced loses punch fast. The protein (if using) must be pre-cooked and finely diced—chicken should be pounded to even thickness for consistent cooking. Carrots? Baby carrots save time, but julienned works too for that restaurant look.
No fish sauce? Soy sauce plus a splash of Worcestershire mimics umami, though it won't be identical. Short on oyster sauce? Extra soy sauce with a pinch of sugar gets you close. The eggs are essential—they bind everything together and add richness. Room temperature eggs scramble faster and more evenly. For the umami trio (soy, fish, oyster), Red Boat fish sauce and Lee Kum Kee oyster sauce are worth the investment—they elevate the dish instantly. The sesame oil and seeds are finishing touches, so use toasted sesame oil (not the cheap, flavorless kind) and store-bought sesame seeds if you're short on time.
Rice reheats beautifully—just spread it on a tray to cool faster. Store in an airtight container for 4-5 days in the fridge, or freeze portions for 3 months. The aromatics (garlic, ginger) keep best in the freezer for 6 months if pre-minced. For meal prep, cook the rice and protein separately, then combine when reheating to maintain texture. The dish peaks when served immediately, but the flavors meld beautifully overnight—perfect for leftovers.
Why You'll Love This Recipe
- One-Pan Magic: I swear by this recipe when I’ve got zero energy—just toss everything in one skillet, and the high-oleic oil keeps it from sticking like glue. That crispy rice? It’s the star, and it happens while you’re chopping the last few veggies.
- Ginger-Garlic Crunch: The secret’s in the maillard reaction—those minced garlic cloves and fresh ginger sizzling in the oil until they’re golden but not burnt. It’s the kind of aroma that fills the kitchen and makes your mouth water before the first bite, even if the rice looks a little uneven.
- Leftovers? Better Than New: Between us, my arborio fried rice tastes better the next day. The rice absorbs all the eggy richness and garlic flavor, turning into this creamy, comforting dish that’s perfect for lunchboxes or a quick reheat. Honestly, I make double batches on purpose.
- Budget Meal That Feeds: This is my go-to when I’m broke but still want something that feels special. Arborio rice is cheap, eggs stretch it further, and the high-oleic oil (which lasts forever) keeps costs low. Plus, it’s the kind of dish that makes even my picky roommate ask for seconds.
Step-by-step instructions for wok-tossed arborio fried rice
Master this technique and you'll transform simple ingredients into restaurant-quality fried rice with perfect texture and umami depth.
Prepare the Protein and Vegetables
Begin by prepping all your ingredients simultaneously to maintain efficiency. For the 1 cup optional protein, pat it completely dry with paper towels and cut into ½-inch dice. This ensures even cooking and prevents excess moisture that could dilute your sauce. Set aside on a plate.
Peel and finely dice the 1 cup carrots into uniform ¼-inch pieces—smaller pieces cook faster and absorb flavor more evenly. Thinly slice the 6 cloves garlic cloves skin-on for maximum aroma, and finely mince the 1.5 tbsp fresh ginger until it becomes nearly paste-like. Slice the 0.5 cup green onions into ¼-inch rings, separating the white and green parts for distinct visual appeal.
Create the Umami Sauce Base
In a small bowl, whisk together the 3 tbsp low-sodium soy sauce, 1 tbsp fish sauce, and 1.5 tbsp oyster sauce. This combination creates the perfect umami foundation—salty, funky, and deeply savory. Taste and adjust seasoning if needed, though the fish and oyster sauces should balance the soy. Set aside while you prepare the rest.
In a separate small bowl, lightly beat the 2 whole large eggs until just combined but still slightly thick. Room temperature eggs scramble more evenly, so remove them from the fridge 15 minutes before cooking. Season with 0.25 tsp ground white pepper and 0.25 tsp diamond crystal kosher salt—this subtle seasoning ensures the eggs complement rather than overpower the dish.
High-Heat Stir-Fry the Protein and Aromatics
Heat a wok or large skillet over high heat until it's nearly smoking. Add the 0.25 cup high-oleic vegetable oil and swirl to coat the surface evenly. Once the oil shimmers, add the 1 cup optional protein and cook undisturbed for 2-3 minutes until the edges begin to brown and develop a golden crust. This initial sear locks in juices and builds flavor.
Push the protein to one side of the wok and add the 6 cloves garlic cloves and 1.5 tbsp fresh ginger. Stir constantly for 30 seconds until the garlic turns golden and the ginger becomes fragrant—this prevents burning, which would make the dish bitter. Add the 1 cup finely diced carrots and stir-fry for 2 minutes until they begin to soften but still retain a slight crunch.
Scramble the Eggs and Incorporate the Rice
Pour the beaten eggs into the wok, tilting the pan to spread them evenly. Let them cook undisturbed for 10 seconds until they begin to set, then use a spatula to gently push the eggs into soft curds while continuously stirring. Once the eggs are 80% cooked but still slightly runny, add the 3 cups day-old arborio rice and toss vigorously to coat every grain in the egg mixture.
The rice should be slightly sticky but not mushy—this is why day-old rice works perfectly. Toss continuously for 1-2 minutes until the rice begins to take on color and the eggs are fully incorporated. This step is critical: the high heat and constant motion create the signature wok-tossed texture that separates great fried rice from good.
Finish with Sauce and Garnish
Pour the prepared sauce over the rice and toss immediately to distribute evenly. Add the 0.5 cup sliced green onions, white and green parts separated, and continue tossing for another 1 minute until everything is heated through and the rice is evenly coated with sauce. The dish should look vibrant with pockets of color from the carrots, green onions, and protein.
Remove from heat and drizzle with 1 tsp sesame oil. Immediately garnish with 1 tbsp toasted sesame seeds and serve while hot. The sesame oil adds a nutty aroma, while the seeds provide both texture and visual appeal. Each bite should deliver a balance of chewy rice, tender protein, sweet carrots, and umami-rich sauce—proof that simple ingredients can create extraordinary results.
Pro Tips For Making Arborio Fried Rice
- STIR FAST, STOP TOASTING: Break the rice into chunks before adding it to the pan—this stops it from clumping into a sticky mess. I used to try to chop it mid-stir, but that just creates dust; prepping it first gives you cleaner, more even pieces every time.
- USE COLD RICE, NOT WET: Day-old arborio rice should be dry and crumbly, not damp or clinging. If it’s sticky, spread it on a tray and let it air-dry for 10 minutes—this keeps the texture crispy instead of gummy. (Yes, even if you’re impatient like me.)
- SCRAMBLE EGGS SEPARATELY: Fry the eggs first in a separate pan until just set, then slice them into strips. Mixing them in with the rice turns them rubbery—this way, they stay tender and add a proper texture contrast. (Your future self will notice the difference.)
- SALT THE GINGER-GARLIC: Toss the minced garlic and ginger with a pinch of salt before cooking—it softens them faster and prevents burning. I learned this the hard way after charring three batches of garlic that tasted bitter. High-heat oil + salt = better flavor, less cleanup.
Storing and reheating your leftovers
Refrigerator Storage
Store your arborio fried rice in an airtight container with a tight-fitting lid to preserve texture and prevent drying. Spread the rice on a tray first to cool completely—this prevents steam buildup that makes it soggy. In the fridge, it keeps well for 4-5 days, with flavors actually deepening as the umami components meld. I like using glass Pyrex containers because they don’t absorb odors and reheat evenly. 🥫
Freezer Prep Tips
For longer storage, portion fried rice into freezer-safe bags or containers, leaving ½-inch headspace for expansion. Freeze for up to 3 months—the toasted sesame seeds and crispy edges may soften slightly, but the core flavors remain intact. I recommend freezing without the garnishes (sesame seeds, green onions) and adding them fresh after reheating. Label bags with the date to track freshness. ❄️
Stovetop Reheating
My preferred method is stovetop reheating over medium heat with a splash of 1 tbsp water or high-oleic oil. Break up any clumps with a spatula and stir constantly for 3-4 minutes until heated through. The oil helps restore crispiness to the rice edges, while water prevents drying. For extra flavor, add ½ tsp soy sauce or a pinch of fish sauce during reheating. 🔥
Microwave Method
For quick reheating, transfer a single serving to a microwave-safe dish and cover loosely with a damp paper towel. Heat on 70% power for 1-2 minutes, stirring halfway through. Add 1 tsp water if the rice seems dry. Avoid overcooking—arborio rice reheats best when just warmed through, not steamed. This method works best for 1-2 servings at a time. ✨
Reviving Texture
If reheated rice turns out dry, don’t toss it! Sprinkle with 1 tsp sesame oil and 1 tbsp warm water, then toss vigorously in a hot wok for 30 seconds to restore moisture and crispiness. This quick fix works wonders for restaurant-quality results every time. The key is high heat and constant motion—just like when you first cooked it! 💫
Nutrition facts
Frequently asked questions
Why does this recipe use arborio rice instead of jasmine or basmati?
Arborio rice has a unique starchy, chewy texture that holds up perfectly to wok-tossing without turning mushy. Unlike jasmine or basmati, its higher starch content creates that signature crispy edge while absorbing flavors beautifully. Plus, it's the same rice used in risotto—you're essentially giving it a second life!
Can I make this vegetarian without sacrificing flavor?
Swap the protein for 1 cup extra-firm tofu (pressed and cubed) or mushrooms (shiitake or cremini). Boost umami with 1 tbsp vegetarian fish sauce substitute or an extra ½ tsp soy sauce. Add ½ cup corn kernels or peas for texture and sweetness. The key is balancing those savory elements—don't skip the oyster sauce substitute (try ½ tsp mushrooms powder).
What's the secret to getting crispy edges on the rice?
Three things: high heat, day-old rice, and constant tossing. Use a wok or cast-iron skillet to maximize surface area. Spread the rice in a single layer and work in batches if needed. The 30-second sear before adding sauce is critical—let those edges brown before incorporating everything. Pro tip: Add a ½ tsp cornstarch to the rice before cooking for extra crispiness!
How do I adjust this for a larger crowd?
Double the recipe but use two woks or a large cast-iron skillet to maintain high heat. Work in 2 batches—cook protein/veggies first, then set aside while you prep the second batch. Keep everything warm in a 200°F oven while you finish. For 8 servings, use 6 cups rice, 4 eggs, and 2 cups protein/veggies. Scale the sauce proportionally too!
What if my rice turns out too dry or mushy?
Too dry? Add 1 tbsp water or broth and toss vigorously. Mushy? The rice was likely too fresh—next time use 2-day-old rice (it's even better!). For immediate fixes, sprinkle with 1 tsp sesame oil and 1 tbsp warm water, then toss in a hot pan for 30 seconds**. The eggs act as a binder, so if you skipped them, add 1 extra egg to the next batch for better texture.