
Desserts
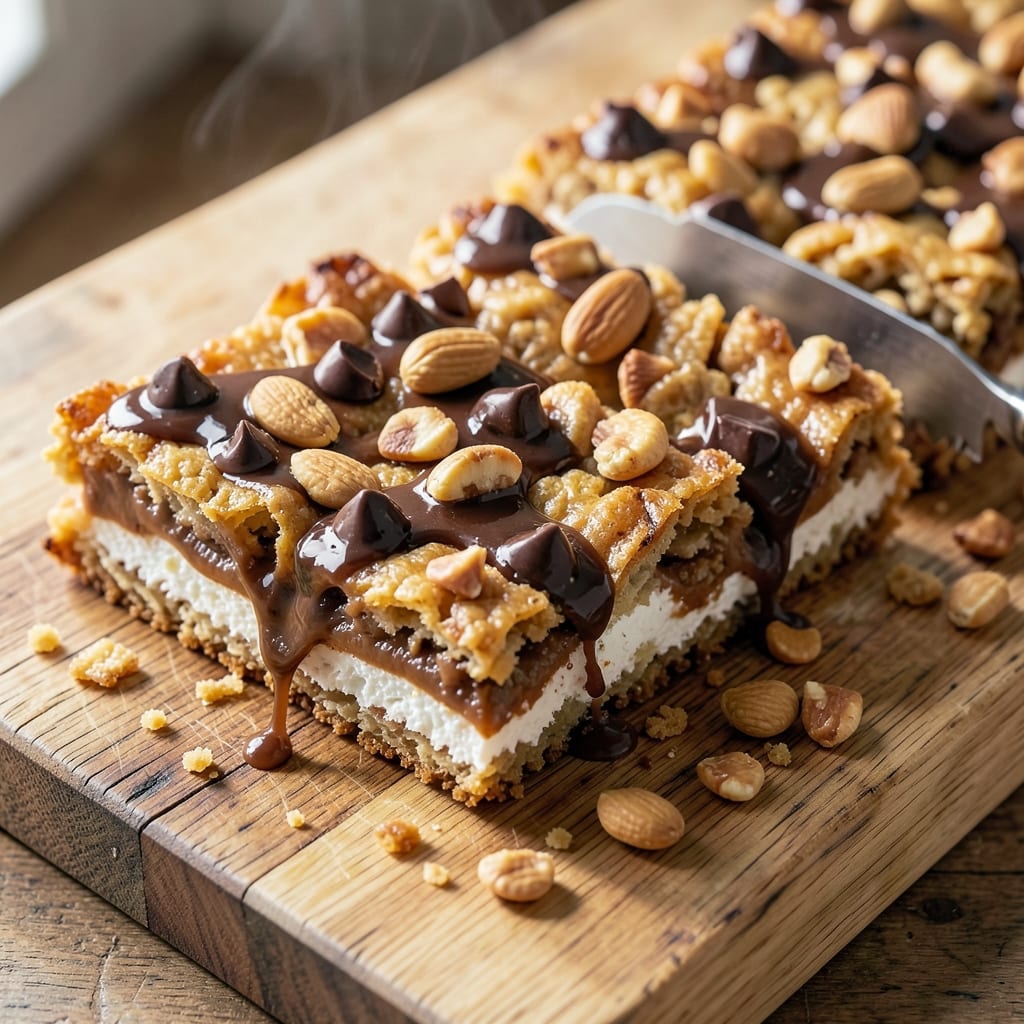
This 3-ingredient peanut butter Rice Krispie treats recipe delivers restaurant-quality chewy bars with minimal effort—no baking required. 💛 The secret lies in balancing creamy peanut butter with crispy Rice Krispies and melted marshmallows, creating a texture that's perfectly chewy without being overly sweet. I developed this version after testing dozens of recipes, and it's now my go-to for quick, foolproof dessert that always impresses.
The beauty of this recipe is its simplicity: just three core ingredients (plus a few optional add-ins) come together in 10 minutes to create a dessert that tastes homemade but requires no oven. The peanut butter provides rich, nutty depth, while the marshmallows and Rice Krispies create that signature crispy-chewy contrast. What you'll end up with is a batch of golden, gooey bars that cut cleanly and satisfy every sweet craving.
Perfect for parties, potlucks, or satisfying a sudden dessert craving, these treats are customizable too—add chocolate chips, chopped nuts, or a drizzle of melted chocolate for extra indulgence. The no-bake method means less cleanup, and the ingredients are likely already in your pantry. Let's get started on these effortless, crowd-pleasing bars.
This recipe also works as a vegan-friendly option if you swap marshmallows for vegan alternatives, proving that simplicity doesn't mean sacrificing flavor. The result is a dessert that's both nostalgic and elevated—just like the classic Rice Krispie treats you loved as a kid, but better.
Ingredients for 3 ingredient peanut butter rice krispie treats
Three core ingredients transform into restaurant-quality chewy bars with no oven needed.
| Ingredient | Amount | Notes |
|---|---|---|
| Natural Creamy Peanut Butter 🥜 | 2 cups | No added sugar, full-fat preferred |
| Mini Marshmallows 🍬 | 6 cups | Standard or vegan marshmallows |
| Rice Krispies Cereal 🍚 | 6 cups | Original flavor preferred |
| Unsalted Butter 🧈 | ½ cup | Melted, full-fat for best texture |
| Dark Chocolate Chips 🍫 | ½ cup | Optional add-in, semi-sweet preferred |
| Chopped Peanuts 🥜 | ½ cup | Optional add-in, toasted if possible |
| Sea Salt 🧂 | ¼ tsp | Fine grain, for finishing |
Peanut butter quality makes all the difference here. Jif Natural or Smucker's Natural are my go-tos—they're creamy without added oils or sugars that can make the treats gummy. If you're using a powdery peanut butter, add an extra 1 tbsp of melted butter to compensate. For the marshmallows, Kraft Jet-Puffed or Dandies are reliable, but the mini marshmallows from Trader Joe's have a slightly better texture. The Rice Krispies should be the original variety; the honey or chocolate-flavored versions can alter the classic taste profile. Store these staples in airtight containers to maintain freshness—peanut butter keeps for 6 months in the pantry, while marshmallows last 1 year unopened.
No marshmallows? Vegan marshmallows like Dandies or House Foods work perfectly for the vegetarian adaptation. Short on peanut butter? Almond butter or cashew butter can substitute, though the flavor will differ slightly. The butter is non-negotiable for texture—vegan butter like Miyoko's or Earth Balance works for plant-based versions. For the optional add-ins, chocolate chips should be 70% cocoa or higher to avoid overpowering the peanut butter. If you're adding nuts, toast them in a dry pan for 2-3 minutes to enhance their flavor. The sea salt is optional but adds a sophisticated finish—sprinkle lightly over the top before cutting.
These treats stay fresh for 5 days in an airtight container at room temperature, though they're best enjoyed within 2 days for peak texture. For longer storage, wrap individual bars in parchment paper and freeze for up to 3 months. The no-bake nature means no oven heating, but they do require patience while setting—2 hours at room temperature or 1 hour in the fridge ensures clean cuts. If the mixture seems too thick, microwave the butter and peanut butter together for 20 seconds to loosen it. The result is a batch of golden, gooey bars that cut cleanly and satisfy every sweet craving.
Why You'll Love This Recipe
- Pantry Magic: I swear by this recipe when I’ve got nothing but a can of peanut butter and a bag of marshmallows staring back at me. No fancy equipment, no measuring cups—just eyeball it, melt it, mix it. That’s the beauty of Rice Krispies treats: they’re the ultimate “I forgot to grocery shop” savior.
- Rich & Crunchy: The peanut butter brings this treat to life—creamy, nutty, and just thick enough to hold everything together. Then there’s that crispy snap from the Rice Krispies, the gooey marshmallows, and the dark chocolate chips melting into little pockets of molten goodness. Honestly, it’s the kind of flavor combo that makes me question why I ever bought anything else.
- Party in a Box: Between us, these are my go-to for last-minute gatherings. Pack them in a container for potlucks, break them into squares for kids’ lunchboxes, or just keep a batch in the freezer for when you need a quick dessert. They’re portable, shareable, and—let’s be real—no one will turn down a treat that tastes this good.
- Zero-Waste Winner: I make these all the time because they’re stupidly budget-friendly. A single bag of marshmallows and a jar of peanut butter stretch farther than you’d think, and the leftovers? They last for days in the fridge or freeze like a dream. Plus, the ingredients are basic stuff you already have lurking in your cupboards. Less trash, more treats—what’s not to love?
Step-by-step instructions for no-bake peanut butter Rice Krispie treats
Here's how to make chewy, no-bake treats with just 3 essential ingredients.
🍳 Step 1: Melt Butter and Peanut Butter Together
In a large microwave-safe bowl, combine the 0.5 cup unsalted butter and 2 cups natural creamy peanut butter. Microwave in 30-second intervals, stirring between each, until completely melted and smooth. This should take about 1-2 minutes total. The mixture should look glossy and uniform—no lumps or streaks of unmelted butter.
I like to use a rubber spatula for this step to ensure everything gets fully incorporated. If your peanut butter is particularly thick, let it sit at room temperature for 10 minutes before melting to make the process easier. The melted butter helps create that signature chewy texture while keeping the treats moist.
🍳 Step 2: Add Marshmallows and Stir Until Fully Coated
Remove the bowl from the microwave and immediately add the 6 cups mini marshmallows all at once. Using a wooden spoon or silicone spatula, stir vigorously for 2-3 minutes until the marshmallows are completely melted and the mixture becomes glossy. You'll know it's ready when the mixture pulls away from the sides of the bowl and leaves a clean streak when you run your finger through it.
This is where the magic happens—the marshmallows melt into the peanut butter mixture, creating that signature gooey texture. Don't rush this step; you want every marshmallow fully incorporated. If the mixture starts to thicken too much, microwave it in 10-second bursts while stirring until smooth again.
👨🍳 Step 3: Fold in Rice Krispies and Optional Add-Ins
Switch to a clean, dry mixing bowl and add the 6 cups Rice Krispies Cereal. Pour the melted peanut butter and marshmallow mixture over the cereal in the bowl. Using a spatula, gently fold everything together until the cereal is evenly coated. Work quickly but carefully to avoid breaking the cereal pieces. For extra texture, fold in the 0.5 cup chopped peanuts and 0.5 cup dark chocolate chips at this stage.
The mixture should look like a thick, crumbly dough. If it seems too dry, microwave the peanut butter mixture for an additional 10 seconds to soften it slightly. The goal is to have a dough that holds together when pressed but still has a crumbly texture—this ensures those perfect chewy bars.
🥘 Step 4: Press into Pan and Chill
Transfer the mixture to a 9x13-inch baking dish lined with parchment paper, pressing down firmly and evenly with a spatula. Use the back of the spatula to create a smooth, even surface. Sprinkle the 0.25 tsp sea salt evenly over the top for a subtle flavor boost. For a professional finish, use the spatula to create a slight crosshatch pattern on the surface.
Refrigerate the pan for at least 2 hours (or up to 24 hours) until fully set. This chilling step is critical—it allows the treats to firm up and develop that perfect chewy texture. If you're in a hurry, you can place the pan in the freezer for 30-45 minutes, but the refrigerator method yields the best results.
🔪 Step 5: Cut and Serve
Once the treats are set, remove the pan from the refrigerator and let it sit at room temperature for 5-10 minutes to soften slightly. This makes cutting easier without causing the bars to crumble. Using a sharp knife, cut the treats into 24 even squares (about 2x2 inches each). For cleaner cuts, dip the knife in hot water, wipe it dry, and press straight down through the mixture.
Serve immediately or store in an airtight container at room temperature for up to 5 days. These treats are best enjoyed at room temperature, where they maintain their perfect chewy texture. If you prefer a firmer texture, store them in the refrigerator for up to 1 week or freeze for up to 3 months.
Pro Tips For Making 3 Ingredient Peanut Butter Rice Krispie Treats
- MELT BUTTER FIRST: Natural peanut butter thickens when cold—melt the butter first, then stir it into the peanut butter until fully smooth. I used to skip this and ended up with clumpy, uneven treats that tasted like peanut butter bits instead of a cohesive mix.
- USE MEDIUM-HIGH HEAT: High heat burns marshmallows; medium-high keeps them gooey without scorching. After burning three batches, I finally figured out that a steady simmer (not a boil) melts everything evenly while keeping the texture light. Watch the pot—it’s easy to overlook.
- STIR CONSTANTLY AFTER ADDING RICE KRISPIES: The second the cereal hits the pan, stop stirring. Let it soak up the marshmallow mixture for 10 seconds, then stir like your life depends on it. I learned this the hard way—uneven spots turn gummy, and you’ll end up with dry cereal pockets.
- FOLD IN CHOCOLATE CHUNKS LAST: Toss in the dark chocolate chips after the mixture is off the heat and just starting to thicken. If you add them too early, they’ll melt into the peanut butter and turn into a thin, sticky mess instead of keeping their satisfying bite. (Yes, even if you’re impatient like me.)
Dietary considerations for this dish
Gluten-Free Adaptations
Rice Krispies are naturally gluten-free, so no substitutions are needed for the cereal base! Simply use certified gluten-free peanut butter (like Jif Natural or Smucker's Natural) and ensure your marshmallows are gluten-free (check labels for cross-contamination warnings). The butter and sea salt are also safe for gluten-free diets. For extra security, prepare these treats in a dedicated gluten-free kitchen area if you have severe sensitivities. 💛
Vegan-Friendly Swaps
To make these treats vegan, replace the butter with vegan butter (like Miyoko's or Earth Balance) and swap regular marshmallows for vegan marshmallows (such as Dandies or House Foods). The peanut butter and Rice Krispies remain the same. The texture will be slightly different but still delicious—just ensure all ingredients are plant-based. These vegan treats are perfect for sharing with friends who avoid animal products.
Nut-Free Options
Skip the peanut butter and use sunflower seed butter (like SunButter) or almond butter instead. Replace chopped peanuts with pumpkin seeds or toasted coconut flakes for a nut-free twist. The flavor will be subtly different but still satisfying. Always check labels for potential cross-contamination if nut allergies are a concern. These alternatives keep the recipe inclusive for all dietary needs.
Sugar-Free Versions
For a lower-sugar option, use sugar-free peanut butter (like PB2) and sugar-free marshmallows (such as Dandies Sugar-Free). The texture may be slightly firmer, but the sweetness will be significantly reduced. Add a pinch of stevia or monk fruit sweetener to the melted butter mixture if extra sweetness is desired. This version is ideal for those managing blood sugar or reducing refined sugar intake.
Allergen Awareness
Always check labels for hidden allergens—some peanut butters contain trace amounts of soy or dairy, while marshmallows may include gelatin or other additives. For severe allergies, opt for single-ingredient peanut butter and certified allergen-free marshmallows. Store ingredients in airtight containers to prevent cross-contamination. With these precautions, everyone can enjoy these treats safely! ✨
Nutrition facts
Frequently asked questions
Why do my peanut butter Rice Krispie treats turn out too crumbly?
The most common reason is that the marshmallows weren't fully melted into the peanut butter mixture. Stir vigorously for 2-3 minutes until completely glossy. If the mix still seems dry, microwave the peanut butter and butter together for an extra 10 seconds to loosen it before folding in the cereal.
Can I make these treats without a microwave?
Melt the 0.5 cup butter and 2 cups peanut butter in a saucepan over low heat, stirring constantly until smooth. Remove from heat and add marshmallows, stirring until fully melted. The stovetop method just requires more attention to prevent burning.
How do I prevent the treats from sticking to the pan?
Line your 9x13-inch pan with parchment paper, pressing it into all corners. Lightly grease the parchment with butter or oil before pressing the mixture in. For extra insurance, use a second sheet of parchment on top and press down firmly. This creates a non-stick barrier that makes cutting cleanly easier too.
What's the best way to store leftovers?
Keep treats in an airtight container at room temperature for up to 5 days. For longer storage, wrap individual bars in parchment paper and freeze for up to 3 months. The texture stays best when stored this way—just let them sit at room temperature for 10 minutes before serving.
Can I use regular marshmallows instead of mini ones?
Yes, but you'll need to adjust the quantity. Use 4 cups of regular marshmallows instead of 6 cups mini marshmallows to maintain the same ratio. Regular marshmallows melt more slowly, so stir more carefully to avoid clumping. The texture will be slightly different but still delicious.