
Main Courses
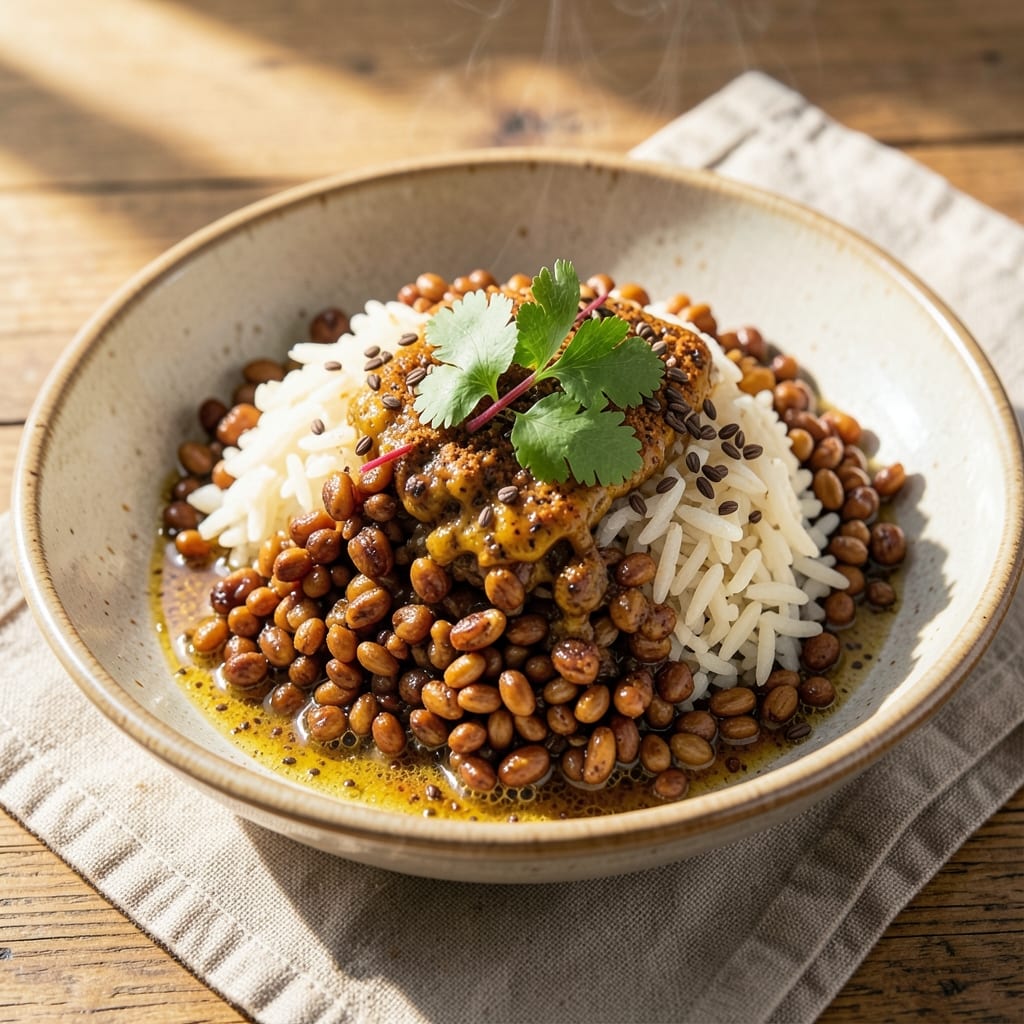
This amaranth and rice recipe transforms two humble ingredients into a protein-packed, earthy bowl that’s ready in just 30 minutes. The secret lies in toasting the amaranth first—this unlocks its nutty depth while keeping the grains tender, creating a dish that’s both satisfying and nutrient-dense. Perfect for vegans, gluten-free diets, or anyone craving a flavorful, one-pot meal without relying on meat or dairy.
The beauty of this recipe is its versatility—use it as a standalone main dish or pair it with roasted vegetables, avocado, or a drizzle of tahini for extra richness. The amaranth adds a satisfying chewiness and a boost of plant-based protein, while the rice soaks up all the aromatic flavors from spices like cumin, turmeric, or smoked paprika. No fancy techniques required, just simple steps that deliver restaurant-quality results at home.
What you’ll end up with is a fragrant, golden bowl of perfectly balanced grains—crisp at the edges, tender inside, and packed with earthy warmth. The texture is ideal for soaking up sauces or standing alone as a hearty, protein-rich meal. It’s the kind of dish that feels nourishing yet exciting, proving that plant-based eating can be bold and delicious without compromise.
Whether you’re meal prepping for the week or whipping up dinner in a flash, this recipe adapts effortlessly. Serve it warm with fresh herbs or chilled in a salad for a refreshing twist. Let’s get cooking—your taste buds (and protein goals) will thank you.
Ingredients for amaranth rice
Two grains, bold spices, and 30 minutes transform humble pantry staples into a protein-rich bowl that feels restaurant-worthy.
| Ingredient | Amount | Notes |
|---|---|---|
| Amaranth Grains 🌾 | 1 cup | Rinsed thoroughly before toasting |
| Long-Grain White Rice 🍚 | 1 cup | Jasmine or basmati preferred |
| Vegetable Broth 💧 | 2 ½ cups | Low-sodium preferred, homemade or store-bought |
| Extra-Virgin Olive Oil 🫒 | 2 tbsp | For toasting grains and seasoning |
| Ground Cumin 🌿 | ½ tsp | Freshly toasted for deeper flavor |
| Turmeric Powder 🌿 | ¼ tsp | Bright yellow color and earthy warmth |
| Smoked Paprika 🌶️ | ½ tsp | Adds subtle smokiness without overpowering |
| Garlic Cloves 🧄 | 3 cloves | Minced finely for aromatic punch |
| Fresh Ginger 🌿 | 1 tbsp | Grated finely for zesty brightness |
| Lemon Juice 🍋 | 1 tbsp | Freshly squeezed for acid balance |
| Fresh Cilantro 🌿 | ¼ cup | Chopped for fresh herb finish (stems too) |
| Sea Salt 🧂 | 1 tsp | Diamond Crystal preferred for dissolution |
| Black Pepper 🌶️ | ¼ tsp | Freshly cracked for heat and aroma |
| Avocado Oil 🫒 | 1 tbsp | For finishing drizzle (optional) |
Amaranth is the star here—look for the tiny, round grains at natural food stores or the bulk section. Bob's Red Mill carries it pre-rinsed, which saves you a step, but rinsing at home removes any bitterness. The rice? Jasmine or basmati holds up best to the long cooking time, but any long-grain works. Toasting the amaranth first is non-negotiable—it unlocks that nutty depth that makes this dish sing. I usually toast mine in a dry skillet until it smells toasty, then transfer to a bowl before adding oil. Quick tip: if you're short on time, toast it in the same pot you'll cook the rice in—just be ready to add the rice immediately after toasting.
No cumin? Corriander seeds toasted and ground work in a pinch, though the earthy depth won't be identical. Smoked paprika hard to find? Regular paprika plus a pinch of liquid smoke mimics the effect. Fresh ginger too spicy? Substitute with ground ginger at half the amount, but you'll lose that bright zing. The cilantro can be swapped for parsley if you're not a fan—just double the amount for similar freshness. And that avocado oil finish? Toasted sesame oil is a fantastic alternative if you're going for an Asian-inspired twist. Pro move: make extra broth while you're at it—it freezes beautifully for future meals.
This keeps 4-5 days in the fridge, though it tastes best within 2 days. The amaranth gets softer over time, so reheat gently with a splash of water or broth. Freezes for 3 months if portioned into airtight containers—perfect for meal prep. I like to store it in glass containers with parchment paper between layers to prevent sticking. For serving, a quick drizzle of avocado oil and extra cilantro makes all the difference. The flavors actually improve overnight, so leftovers are a must. Want to get fancy? Serve with a side of quick-pickled vegetables or a dollop of vegan yogurt for extra tang.
Why You'll Love This Recipe
- No-Soaking Needed: I’ll admit, I was skeptical about amaranth at first—until I realized you don’t even need to soak it. Just rinse the grains, toss them in with the rice and broth, and let the cumin work its magic. Twenty minutes later, you’ve got a dish that feels fancy without the fuss.
- Earthy Cumin Magic: That little teaspoon of ground cumin? It’s the secret weapon here. The rice absorbs the warmth of the spice while the amaranth adds a nutty crunch—like a cozy hug in bowl form. Honestly, I’ve made this for people who “don’t like spices,” and they still ask for seconds.
- Meal Prep MVP: This keeps perfectly for four days in the fridge, and reheats like it just came out of the pot. I double the batch every Sunday because it’s my go-to for lunches, potlucks, or even a quick dinner when I’m too tired to think. The amaranth holds its shape, so no mushy leftovers here.
- Budget Boost: Amaranth might sound fancy, but it’s cheaper than quinoa and stretches further than rice alone. Pair it with beans or roasted veggies, and you’ve got a filling, protein-packed meal that won’t break the bank. Between us, I’ve fed a crowd of six for under $10 with this trick.
Step-by-step instructions for earthy amaranth and rice bowl
Here's how to create this protein-packed, flavorful dish with minimal effort.
Toast the Grains for Maximum Flavor
Heat a large skillet over medium-high heat and add the 2 tablespoons extra-virgin olive oil. Once shimmering, add the 1 cup amaranth grains and 1 cup long-grain white rice. Stir constantly for 3-4 minutes until the grains turn a rich golden brown and release a nutty aroma.
This toasting step is crucial—it deepens the natural earthiness of the amaranth and prevents the grains from becoming mushy. You'll know it's ready when the grains look toasted and smell intensely nutty. Remove from heat and set aside in a bowl.
Build the Spiced Broth Base
In the same skillet, reduce heat to medium and add the 3 minced garlic cloves and 1 tablespoon grated fresh ginger. Sauté for 1 minute until fragrant but not browned. Add the 0.5 teaspoon ground cumin, 0.25 teaspoon turmeric powder, and 0.5 teaspoon smoked paprika, stirring for 30 seconds to toast the spices and release their aromatic oils.
Pour in the 2.5 cups vegetable broth and bring to a gentle boil. Stir once to combine with the toasted spices, then reduce heat to low. Add the toasted amaranth and rice mixture, along with the 1 teaspoon sea salt and 0.25 teaspoon black pepper. Stir gently to distribute everything evenly.
Simmer Until Perfectly Tender
Cover the skillet with a tight-fitting lid and simmer for 20-22 minutes without stirring. The grains should absorb the liquid completely, leaving you with fluffy, separate grains rather than a mushy mass. If you notice liquid remaining after 18 minutes, uncover and simmer for another 2-3 minutes to evaporate any excess.
Here's the thing—amaranth has a unique texture that needs gentle handling. The grains should be tender but still hold their shape, with a slight bite that contrasts nicely with the softer rice. When done, the mixture should look golden and fragrant with those warm spice notes.
Finish with Bright, Fresh Elements
Once the grains are tender, remove from heat and stir in the 1 tablespoon freshly squeezed lemon juice. This bright acidity cuts through the earthy richness of the amaranth and rice. Let the mixture sit covered for 5 minutes to allow the flavors to meld.
Just before serving, stir in the 0.25 cup chopped fresh cilantro and drizzle with the 1 tablespoon avocado oil. The cilantro adds a fresh herbal note that balances the warm spices, while the avocado oil adds a silky finish. For extra richness, you could also add a dollop of Greek yogurt or a sprinkle of toasted sesame seeds.
Serve Immediately for Best Texture
Divide the warm amaranth and rice mixture among serving bowls. The grains should be perfectly tender with a slight chew, and the aromas should be complex—nutty from the toasting, warm from the spices, and bright from the lemon and cilantro.
This dish tastes best served immediately while the grains are warm and the flavors are at their peak. The texture contrast between the amaranth's slight bite and the rice's softness makes every bite satisfying. Pair with a simple cucumber salad or steamed greens for a complete meal.
Pro Tips For Making Amaranth Rice
- Toast the Amaranth First: I learned this the hard way—skipping the toast can make your amaranth taste bitter and gummy. Heat a dry skillet over medium-high, add the grains, and stir constantly for 3-4 minutes until they smell nutty and pop. This step is non-negotiable for texture and flavor.
- Use a 3:1 Rice Ratio: Mix amaranth and white rice in a 1:3 ratio (1 part amaranth to 3 parts rice). Amaranth absorbs liquid differently—too much and it’ll dry out; too little and you’ll have a mushy mess. Measure carefully, or your dish will end up either crunchy or gluey.
- Bloom the Cumin: Toast the ground cumin in the olive oil for 30 seconds before adding broth—it releases its aroma and deepens the flavor. Skip this, and your dish will taste flat, even if you use the right amount. (Yes, even if you’re impatient like me.)
- Simmer Covered, Low and Slow: After adding broth, bring to a boil, then reduce to the lowest possible heat and simmer for 25-30 minutes. Peeking too often or letting it boil hard turns the rice into mush. Let it cook undisturbed—your future self will thank you.
Essential equipment for great amaranth rice
Skillet Essentials
You’ll need a large, heavy-bottomed skillet—I recommend a 10-12 inch cast iron like the Lodge Pre-Seasoned for even heat distribution. Cast iron holds heat beautifully, preventing hot spots that could burn your grains. If you don’t have cast iron, a stainless steel skillet with a tight-fitting lid works too. Just avoid nonstick—it won’t get hot enough for proper toasting. 🔥
Lid for Even Cooking
A tight-fitting lid is non-negotiable for this recipe. I use a glass or stainless steel lid with a handle—it lets you peek at the grains without losing steam. If your lid doesn’t seal well, cover with a clean kitchen towel and press down firmly to trap moisture. Pro tip: Place a small plate under the towel to prevent condensation from dripping onto your stove.
Measuring Tools
For precise measurements, grab a stainless steel measuring cup and a fine-mesh strainer (for rinsing amaranth). A microplane is handy for grating fresh ginger, but a cheese grater works in a pinch. For mincing garlic, a garlic press saves time, though a sharp knife works just as well. I keep a small bowl nearby to catch any excess liquid from rinsing grains or squeezing lemon juice.
Spice Toasting Tools
Toasting spices in the same skillet where you cook the grains maximizes flavor. A small wooden spoon or silicon spatula helps stir spices without scratching your pan. For freshly ground spices, a mortar and pestle works wonders—just toast whole spices (like cumin seeds) first, then grind them. If you’re short on time, pre-toasted spices from Penzeys Spices add depth without extra effort. 🌿
Storage Containers
For leftovers, use glass airtight containers with parchment paper between layers to prevent sticking. I love Pyrex glass storage containers because they’re microwave-safe and stackable. For freezer storage, quart-sized freezer bags with the air squeezed out work best—just label with the date. A sharp knife or rice paddle helps divide portions neatly for reheating.
Nutrition facts
Frequently asked questions
Why does the recipe call for toasting the amaranth and rice together?
Toasting the grains together unlocks their full flavor potential while preventing the amaranth from becoming mushy. The high heat caramelizes the natural sugars in both grains, creating a nutty depth that transforms this into a restaurant-quality dish rather than just a bland grain mix. Plus, it ensures even cooking later in the broth.
Can I substitute quinoa for the amaranth in this recipe?
Yes, but the texture and flavor will differ slightly. Quinoa has a firmer bite and absorbs flavors differently than amaranth. Use a 1:1 ratio and reduce cooking time by 3-4 minutes since quinoa cooks faster. The dish will still be delicious, though the earthy nuttiness of amaranth will be less pronounced.
How do I adjust this recipe for a larger group?
Double all ingredients and use a 14-inch skillet or Dutch oven for even cooking. Increase broth by 1/4 cup per additional cup of grains to maintain proper liquid-to-grain ratio. Cooking time will extend by 2-3 minutes—check for doneness at 23-25 minutes after adding liquid.
What if my amaranth rice turns out too dry?
If the grains are dry, simply add 2-3 tablespoons warm broth and stir gently. Cover and let sit for 5 minutes before serving. For future batches, reduce heat to low during the last 5 minutes of cooking to prevent excess evaporation. A splash of lemon juice afterward helps restore moisture balance.
Can I make this recipe ahead of time for meal prep?
This dish actually tastes better the next day as flavors meld. Store in an airtight container for up to 5 days in the fridge. Reheat with 1 tablespoon broth per cup of grains, covered on low heat for 5 minutes. For freezer prep, portion into quart-sized bags and freeze for up to 3 months.