
Main Courses
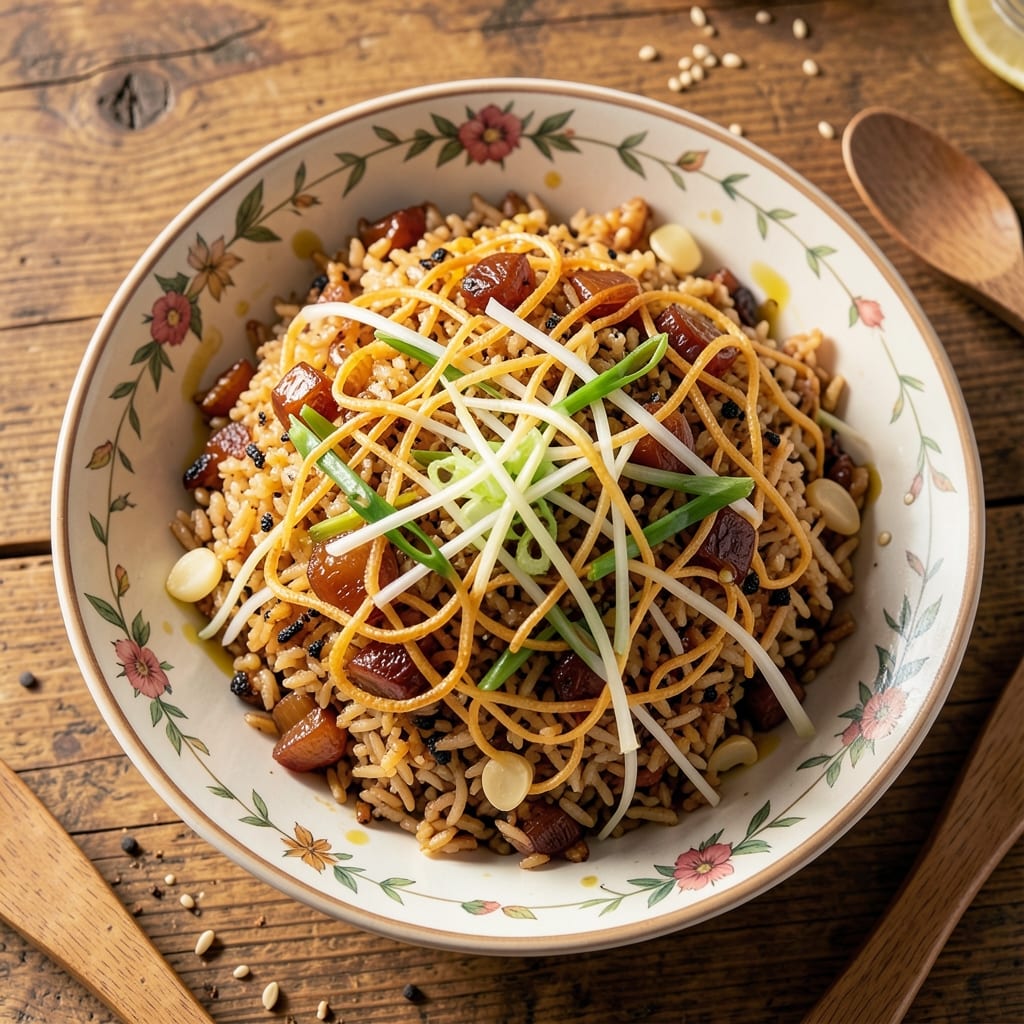
This Arirang fried rice recipe delivers the heartwarming comfort of Korea’s most beloved homestyle dish, where every bite features delicate egg threads and perfectly seasoned grains. The name Arirang—inspired by Korea’s iconic folk song—reflects the dish’s cultural soul, blending simplicity with restaurant-quality texture. What sets this version apart is the crispy egg threads, a signature technique that transforms ordinary fried rice into something extraordinary. The foundation starts with day-old rice, stir-fried in a hot wok with garlic, ginger, and scallions to build aromatic depth. A splash of soy sauce and sesame oil creates the signature umami balance, while a touch of sugar enhances the natural sweetness of the rice. The secret to those signature egg threads? Whisking eggs with a splash of water before stirring them into the hot rice—creating silky, crispy strands that elevate every forkful. By the time you plate it, you’ll have golden, fragrant fried rice with crispy egg threads that melt in your mouth, balanced by the savory-sweet sauce. The dish is complete with scallions and sesame seeds for freshness, but the real magic lies in the technique—where every ingredient works together to create a dish that tastes like home. Serve it as a comforting meal or share it at gatherings—this recipe is designed to impress. For added protein, consider stir-frying diced ham, shrimp, or even leftover chicken into the rice. The beauty of this dish lies in its adaptability, but the core technique remains the same: high heat, quick cooking, and that perfect egg thread texture. Let’s get cooking!
Ingredients for arirang fried rice
Day-old rice, crispy egg threads, and aromatic garlic-ginger base—this is Korean comfort food at its finest.
| Ingredient | Amount | Notes |
|---|---|---|
| Day-Old Cooked White Rice 🍚 | 4 cups | Cold and dry preferred |
| Large Eggs 🥚 | 4 whole | Room temperature for best threads |
| Vegetable Oil 🫒 | ½ cup | High smoke point preferred |
| Garlic Cloves 🧄 | 4 cloves | Minced finely for aroma |
| Fresh Ginger 🌿 | 1 tbsp | Grated finely (peeled) |
| Green Onions 🧅 | ½ cup | Thinly sliced, white and green parts |
| Soy Sauce 🍶 | ¼ cup | Korean or light soy preferred |
| Sesame Oil 🫒 | 1 tbsp | Toasted for nutty flavor |
| White Sugar 🍚 | 1 tbsp | Balances savory flavors |
| Sesame Seeds 🌾 | 1 tbsp | Toasted lightly for garnish |
| Salt 🧂 | ½ tsp | Adjust to taste |
| Black Pepper 🌶️ | ¼ tsp | Freshly ground preferred |
| Water 💧 | 2 tbsp | For whisking eggs |
The rice is non-negotiable—day-old works best (fresh rice turns mushy). Korean short-grain rice is ideal, but jasmine or basmati in a pinch. For garlic and ginger, H Mart or Korean grocery stores carry the freshest, most aromatic varieties. The eggs? Pasture-raised if you can find them—they create richer, silkier threads. Toast your sesame seeds in a dry pan for 30 seconds before adding to the rice; this boosts their nutty flavor dramatically. Soy sauce matters too—Korean soy sauce has deeper umami, but light soy works if that's all you have.
No soy sauce? Coconut aminos at double the amount gets you close. Fresh ginger too expensive? Ground ginger at half the amount works, but fresh is worth it. Eggs too pricey? Silken tofu blended with a splash of water mimics the texture. The water for whisking eggs is crucial—it creates those signature crispy strands. Don't skip it! For extra protein, stir-fry diced ham, shrimp, or leftover chicken in the oil before adding rice. The key is high heat—your wok should be screaming hot before the rice hits the pan.
Rice keeps 3-4 days in the fridge, but the egg threads lose crispiness after day two. For best results, reheat in a dry pan over medium heat. Sesame oil and seeds can be toasted ahead and stored in an airtight container for up to 2 weeks. Double the batch—this dish disappears fast at gatherings. Freeze portions without the egg threads (add them fresh when reheating) for up to 3 months. The secret to restaurant-quality texture? Work fast and keep the heat high—that's what creates those magical crispy strands.
Why You'll Love This Recipe
- One-Pan Magic: I swear by this recipe when I don’t want to dirty a million dishes—just one wok or skillet, a spatula, and you’re done. The eggs sizzle right into the rice while the garlic and ginger toast in the same oil, so you’re not juggling pots.
- Crispy-Creamy Balance: That first bite where the egg’s edges go crispy but the yolk stays runny? Pure satisfaction. The day-old rice soaks up the garlic-ginger oil like a sponge, giving every mouthful a savory punch without needing fancy sauces.
- Leftover Hero: Between us, this is my go-to for turning stale rice into something edible. I make a big batch on Sundays—it reheats perfectly, and the flavors only deepen. My kids even ask for it over takeout.
- Budget Breakthrough: Honestly, this recipe costs me pennies but feels like a restaurant meal. Eggs, rice, and a few cloves of garlic? That’s it. I stretch it into lunches for days, and honestly, no one can tell it’s not from a food truck.
Step-by-step instructions for Korean-style arirang fried rice
Here's how to achieve that perfect balance of crispy egg threads and savory rice—every bite delivers comfort.
Prepare the Egg Mixture for Perfect Threads
In a medium bowl, whisk together the 4 whole large eggs and the 2 tablespoons water until completely combined. The water helps create those signature crispy egg threads that set arirang apart. Add the 0.5 teaspoon salt and 0.25 teaspoon black pepper, mixing until evenly distributed. I like to use room-temperature eggs—they whisk smoother and create more delicate threads when cooked.
Set the bowl aside while you prepare the rice. Don't skip this resting time—letting the egg mixture sit for 5 minutes at room temperature ensures even cooking later. This step is non-negotiable for achieving those beautiful, wispy egg strands that make arirang special.
Cook the Eggs to Crispy Perfection
Heat a large non-stick skillet over medium-low heat and add the 0.5 cup vegetable oil. Let it warm through until it shimmers but doesn't smoke. Pour in the egg mixture and let it sit undisturbed for 10 seconds—this allows the eggs to set slightly at the bottom before gently pushing them into thin strands with a silicone spatula.
Cook for 1-2 minutes until the eggs are light golden and form delicate, crispy threads. Remove from heat and transfer to a plate, leaving the oil in the pan. The eggs should be just set but still slightly moist inside—overcooking will make them rubbery. This is where the magic happens: those crispy egg threads will add texture and depth to your fried rice.
Stir-Fry the Aromatics and Rice
Return the skillet to medium-high heat and add the 4 cloves minced garlic and 1 tablespoon grated ginger. Cook for 30 seconds until fragrant—you should smell that fresh, bright aroma. Add the 4 cups day-old cooked white rice, breaking up any clumps with your spatula. The rice should sizzle as it hits the hot pan.
Stir-fry for 2-3 minutes, letting the rice absorb the garlic and ginger flavors. This is where you build the foundation of your dish. If the rice seems dry, add 1 tablespoon water and stir to help steam it slightly. The goal is to heat through while maintaining some texture—you want each grain to stay distinct, not mushy.
Season and Combine All Ingredients
Push the rice to one side of the pan and add the 0.5 cup thinly sliced green onions. Stir for 30 seconds until just wilted. Pour in the 0.25 cup soy sauce and 1 tablespoon white sugar, mixing well to coat the rice evenly. The sugar balances the savory soy sauce, creating that perfect umami-sweet harmony that defines arirang.
Return the crispy egg threads to the pan and toss everything together. Cook for another 2 minutes until the rice is heated through and the flavors meld. The eggs should be warmed through but still maintain their crispy texture. Taste and adjust seasoning—you might need a bit more soy sauce or sugar depending on your preference. This is where you ensure every bite delivers that comforting balance of flavors.
Finish with Sesame Oil and Garnish
Remove the skillet from heat and drizzle in the 1 tablespoon sesame oil. Toss gently to distribute evenly—this adds that nutty aroma and rich depth to the dish. Sprinkle with the 1 tablespoon toasted sesame seeds and any remaining green onions. The sesame oil should sizzle slightly as it hits the hot rice, releasing its aromatic oils.
Serve immediately while the rice is hot and the egg threads maintain their crispy texture. Each bite should deliver that perfect combination of crispy eggs, savory rice, and aromatic green onions. The contrast between the tender rice and crispy egg threads is what makes arirang so satisfying—don't let it sit too long, or you'll lose that texture.
Pro Tips For Making Arirang Fried Rice
- CRACK EGGS LAST MINUTE: I used to prep everything ahead, including beating eggs, but the texture suffers if they sit. Beat them fresh right before cooking—room temperature eggs scramble faster and stick together better for that classic Arirang bite. (Yes, even if you're impatient like me.)
- BREAK GINGER SMALL: Slice that ginger into paper-thin shavings instead of chunks—it infuses flavor without overpowering. My grandmother swore by this, and she was right: the heat mellows into the rice instead of sitting like a chewy afterthought.
- DON’T OVERMIX THE RICE: Stir just until the rice is mostly coated—lumpy is fine. Overworking it turns fried rice into glue. I learned this the hard way after making a sad, dense pile that stuck to the wok like regret.
- USE COLD RICE: Day-old rice is non-negotiable, but if you’re desperate, spread freshly cooked rice on a tray and refrigerate for 30 minutes. Cold rice fries up crispier and absorbs sauce better. (Your future self will thank you.)
Make-ahead tips for arirang fried rice
Prep Ahead Essentials
Start by cooking your rice a day ahead—this is non-negotiable for perfect texture. Store the 4 cups day-old rice in an airtight container in the fridge. The starches firm up overnight, preventing that dreaded mushy texture. I like to make a big batch and freeze half for future meals—just thaw overnight in the fridge before using. 🌟
Egg Thread Prep
Whisk your 4 eggs with 2 tbsp water and 0.5 tsp salt the night before, then refrigerate in a sealed container. This gives the eggs time to fully absorb the water, creating those signature crispy strands when cooked. When ready to use, let them sit at room temperature for 5 minutes before cooking—this ensures even cooking and prevents rubbery eggs. Trust me, this small step makes all the difference!
Protein Additions
For extra protein, prep your additions ahead of time. Dice ½ lb ham or chop ½ lb shrimp and store in separate airtight containers. When ready to cook, stir-fry them in the oil for 2-3 minutes before adding the rice. This keeps your prep organized and ensures everything cooks at the same time. I often prep these the night before so I can focus on the rice and egg threads during cooking. ⏰
Sesame Oil Boost
Toast your 1 tbsp sesame seeds in a dry pan for 30 seconds until fragrant, then store in an airtight container. This adds incredible depth to your fried rice. Keep the 1 tbsp sesame oil in a small bottle in your fridge—it's best used fresh. When reheating, add the sesame oil just before serving to preserve its aromatic oils. This simple step transforms ordinary fried rice into something extraordinary.
Reheating Like a Pro
To reheat, spread your fried rice in a single layer on a baking sheet and warm in a 350°F oven for 5-7 minutes. For stovetop reheating, use a non-stick pan over medium heat with 1 tbsp oil to prevent sticking. Add 1 tbsp water to help steam the rice—this keeps it moist and flavorful. The key is to work quickly and keep the heat high to maintain that crispy egg thread texture. 💫
Freezer-Friendly Tips
Arirang fried rice freezes beautifully for up to 3 months—just store the rice portion (without egg threads) in a freezer bag. When ready to eat, thaw overnight in the fridge, then reheat using the stovetop method above. Add the egg threads fresh after reheating to preserve their crispy texture. I like to portion individual servings so I can grab and reheat just what I need. This makes it perfect for busy weeknights or meal prep Sundays. ❄️
Nutrition facts
Frequently asked questions
Why does this recipe use day-old rice instead of fresh?
Day-old rice works best because its starches have firmed up, preventing that dreaded mushy texture when stir-fried. Fresh rice releases too much moisture, turning fried rice into a sticky mess. The slight dryness in day-old rice creates that perfect bite and texture that makes this dish so satisfying!
How do I get those perfect crispy egg threads?
The secret lies in whisking eggs with 2 tablespoons water and letting them sit for 5 minutes before cooking. Use a hot pan on medium-low heat and let the eggs set slightly before gently pushing them into strands with a spatula. Cook just until light golden—overcooking makes them rubbery!
Can I make this recipe with jasmine rice instead of Korean short-grain?
Yes, you can use jasmine rice as a substitute, though Korean short-grain has a slightly stickier texture that works better. For best results, cook the jasmine rice slightly drier than usual (about 5 minutes less than package instructions) to reduce excess moisture. The flavor will still be delicious!
What if I don't have sesame oil?
You can substitute with neutral oil and add ½ teaspoon toasted sesame seeds directly to the rice for flavor. For extra depth, a pinch of ground sesame mixed with the soy sauce works too. The nutty aroma is what makes sesame oil special, but this keeps your dish flavorful!
How do I prevent my fried rice from getting soggy?
Keep your pan on high heat and work quickly—overcrowding releases moisture. Use day-old rice and avoid adding too much liquid. If needed, add just 1 tablespoon water to steam the rice slightly, but don't overdo it. The key is high heat and fast cooking to maintain that perfect crispy texture!