
Main Courses
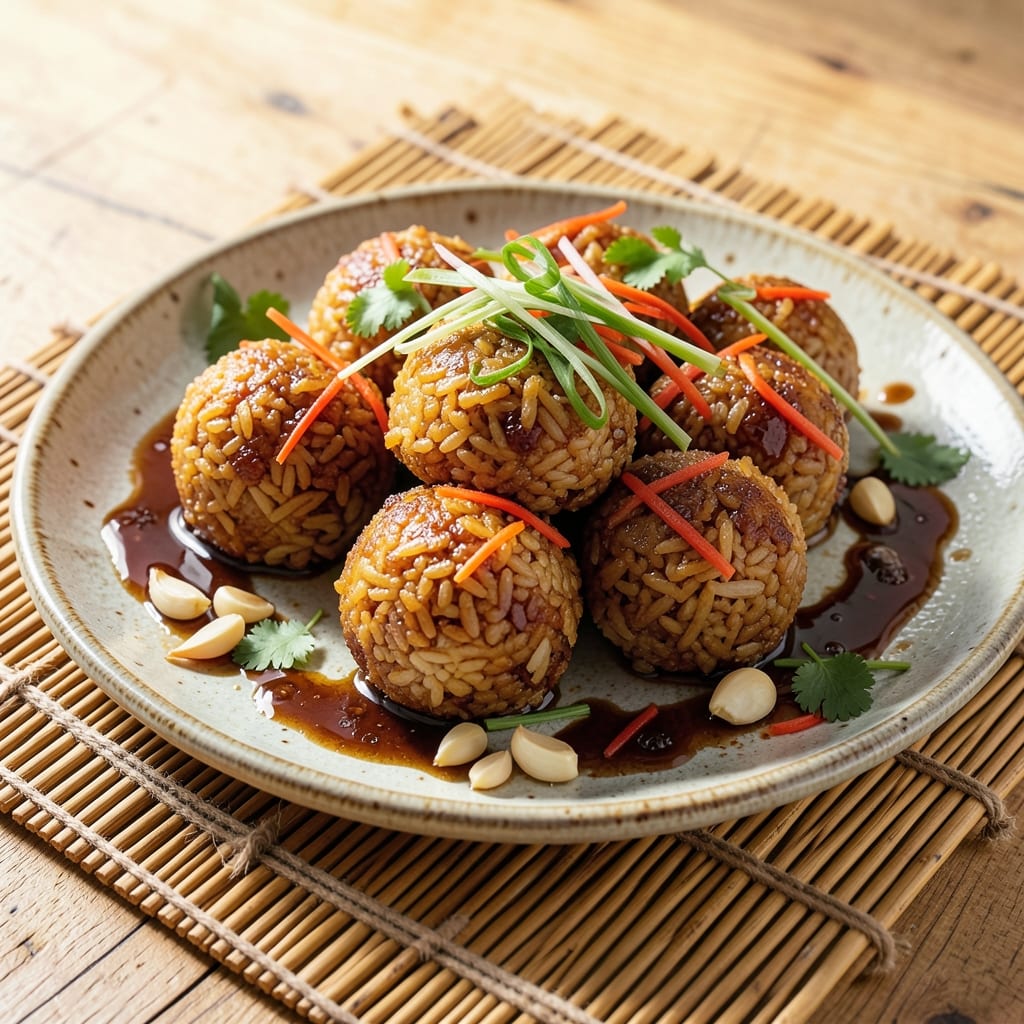
This Asian fried rice balls recipe delivers the perfect balance of crispy exteriors and chewy, flavorful centers—just like your favorite takeout but made at home. The secret lies in the right rice texture and a simple binding technique that holds everything together without falling apart. I developed this version after testing multiple cultural variations, from Japanese onigiri to Chinese fried rice balls, to create a foolproof method that works every time.
What sets this recipe apart is the combination of short-grain rice (for chewiness) and a light egg wash that creates that signature golden-brown crust when fried. You'll start with a flavorful rice base—savory, slightly sticky, and packed with aromatics from garlic, ginger, and soy sauce—then shape it into bite-sized balls. The fillings are completely customizable: classic options include shredded chicken, pork, or tofu, but vegetables like carrots, peas, and scallions work beautifully too.
By the time you're done, you'll have a plate of golden, crispy fried rice balls with tender centers that practically melt in your mouth. The aroma alone—warm, savory, and slightly smoky from the frying—will have everyone asking for seconds. These are perfect for appetizers, party snacks, or a quick lunch that feels special. The best part? They reheat beautifully, making them ideal for meal prep.
Serve with a simple dipping sauce (soy sauce mixed with a touch of vinegar and sesame oil) or a creamy peanut sauce for extra flavor. The crispy exterior gives way to a satisfying chew, making each bite a little taste of Asia. Let's get cooking!
Ingredients for asian fried rice balls
Twelve ingredients for golden, crispy bites with chewy centers—just like takeout!
| Ingredient | Amount | Notes |
|---|---|---|
| Short-Grain White Rice 🍚 | 2 cups | Uncooked, like sushi rice |
| Large Eggs 🥚 | 2 whole | Room temperature for binding |
| Vegetable Oil 🫒 | 3 cups | For deep frying, high smoke point |
| Garlic Cloves 🧄 | 4 cloves | Minced for aromatic base |
| Fresh Ginger 🌿 | 1 ½ tbsp | Grated, for zesty kick |
| Soy Sauce 🍶 | ½ cup | Light or dark preferred |
| Sesame Oil 🫒 | 1 tbsp | Toasted for nutty aroma |
| Green Onions 🧅 | 4 whole | Thinly sliced, for freshness |
| Shredded Carrots 🥕 | 1 cup | Finely julienned for texture |
| Cooked Chicken Breast 🍗 | 1 ½ cups | Shredded, optional filling |
| All-Purpose Flour 🌾 | ¼ cup | For dusting work surface |
| Salt 🧂 | 1 ½ tsp | Adjust to taste |
| Black Pepper 🌶️ | ½ tsp | Freshly ground preferred |
| White Vinegar 💧 | 1 tbsp | For dipping sauce |
The rice is everything here. Sushi rice or any short-grain variety gives that perfect chewy texture—long-grain stays too firm. I grab mine in bulk from Trader Joe's or the Asian market section at Walmart. If you can't find short-grain, jasmine rice is the next best thing, but it'll be slightly stickier. The key is cooking it a little underdone (just until all liquid is absorbed) so it stays pliable for shaping. Pro tip: Rice cookers are your friend—they give consistent results every time.
No chicken? Shredded pork, tofu, or extra veggies work perfectly. The carrots can be swapped for peas or corn if you're feeling lazy. For the egg wash, room temperature eggs are non-negotiable—they bind better and fry up crispier. Short on sesame oil? Toasted peanut oil gives a similar nutty vibe. The dipping sauce is where you can get creative: mix soy sauce with a splash of vinegar, a drizzle of sesame oil, and a pinch of sugar for balance. Or go wild with a spicy sriracha mayo if you're feeling adventurous.
These keep surprisingly well—2 days in the fridge if stored in an airtight container, separated by parchment paper so they don't stick. For longer storage, freeze them unfried on a tray first (so they don't clump), then transfer to a bag. Fry straight from frozen—no thawing needed! The best part? They reheat like a dream. Toss them in the oven at 375°F for 10 minutes to revive that crispy crust. Make a double batch—they disappear fast at parties.
Why You'll Love This Recipe
- No-Chop Necessary: I swear by this one—just stir-fry pre-cooked rice, crack in eggs, and toss with minced garlic and ginger. No dicing, no julienning, just 10 minutes of hands-on time while the real magic happens in the pan.
- Crispy-Creamy Magic: That first bite? The outside gets gloriously golden in the oil, while the inside stays tender with the egg binding everything together. Honestly, the garlic and ginger make it taste like you slaved for hours—when really, you just opened a jar of ginger paste.
- Lunchbox Hero: Between us, these are my go-to for packed lunches. Cold or reheated, they hold up perfectly, and the rice stays separate from the egg so no soggy mess. My kid brings them to school and comes home raving—proof they’re a hit with picky eaters.
- Pantry Staple Savior: Use up leftover rice? Check. Need a cheap, filling meal? Double-check. A dozen of these costs less than a takeout order, and they freeze like a dream. I make a big batch on Sundays and pull them out all week—no more sad, dried-out rice lunches.
Step-by-step instructions for Asian fried rice balls
Here's how to create those irresistible crispy-wrapped bites with perfectly chewy centers.
Cook and Prepare the Rice Mixture
Rinse the 2 cups short-grain white rice thoroughly under cold water until the water runs clear. This removes excess starch that would make the rice gummy. Drain well and transfer to a pot with 2 cups water, 1.5 teaspoons salt, 0.5 teaspoon black pepper, and 1 tablespoon sesame oil. Bring to a boil over high heat, then reduce to low heat, cover, and simmer for 15 minutes. Remove from heat and let steam for 10 minutes with the lid on.
Fluff the rice gently with a fork and spread it on a baking sheet to cool completely. While it cools, shred the 1.5 cups cooked chicken breast and finely julienne the 1 cup shredded carrots. In a small bowl, mix the 4 cloves minced garlic, 1.5 tablespoons grated fresh ginger, and 0.5 cup soy sauce. Once the rice is cool enough to handle, fold in the chicken, carrots, and garlic-ginger mixture until evenly distributed.
Make the Egg Wrappers
Whisk the 2 whole large eggs in a bowl until frothy. Heat a non-stick skillet over medium heat and lightly coat with vegetable oil. Pour a thin layer of egg mixture into the skillet, tilting to spread evenly. Cook until the edges set and the bottom is lightly golden, about 1-2 minutes. Flip carefully and cook the other side for another 30 seconds. Transfer to a plate and repeat until all egg mixture is used, making about 12 thin egg crepes. Let them cool completely.
Once cooled, cut each crepe into 3 equal strips (about 3x4 inches each). You'll have 36 strips total. These will be your crispy wrappers—don't worry if they're not perfect, they'll still taste amazing!
Assemble the Rice Balls
Lay a strip of egg wrapper on a lightly floured surface. Place about 1 tablespoon of the rice mixture in the center. Fold the long sides inward first, then fold the top and bottom edges to completely enclose the filling. Press the edges gently to seal. Repeat with the remaining strips and filling, creating 12 filled egg-wrapped rice balls. Place them seam-side down on a plate dusted with all-purpose flour to prevent sticking.
Here's the thing—don't overstuff them. If the rice mixture bulges too much, the wrappers will tear during frying. A little air gap ensures they stay intact while frying.
Fry to Golden Perfection
Heat 3 cups vegetable oil in a deep pot or Dutch oven to 350°F (use a thermometer for accuracy). Fry 4-5 rice balls at a time for 2-3 minutes until they turn a deep golden brown color. The oil should bubble gently around them. Use a slotted spoon to turn them occasionally for even browning.
Watch carefully—they're done when the wrappers are crispy and the rice inside is heated through. Drain on a wire rack or paper towels. If you prefer extra crispiness, increase the oil temperature to 375°F for the last 30 seconds of frying.
Serve with Fresh Toppings
Once all rice balls are fried, slice the 4 whole green onions thinly. Arrange the fried rice balls on a serving platter and sprinkle with the green onions. For the dipping sauce, whisk together 1 tablespoon white vinegar and 1 tablespoon sesame oil in a small bowl. Serve immediately while still warm and crispy!
These golden, crispy-wrapped bites with chewy centers are perfect for snacking or as an appetizer. The secret to their success lies in the thin egg wrappers and the high-heat frying—don't skip either step! Enjoy them while they're hot and crispy, straight from the fryer.
Pro Tips For Making Asian Fried Rice Balls
- STIR THE RICE DRY: Cold, clumpy rice sticks together like glue—no one wants chewy rice balls. Heat your wok or pan until smoking hot, then toss in the day-old rice (about 2 cups) with 1 tablespoon oil. Stir-fry for 30 seconds before adding anything else. The goal is to wake up the grains so they don’t turn mushy when you add liquid later.
- GRATE GINGER FINE: I used to chop ginger and wonder why my rice balls tasted bland. Fresh ginger needs surface area—grate it on the smallest setting of a box grater (or pulse in a food processor) for a punch that actually cuts through the egg and rice. Use about 1 teaspoon, then toss it straight into the pan with the garlic. No need to cook it first; it’ll soften as you stir.
- DON’T OVERMIX THE EGGS: Crack the eggs into a bowl first, then scramble them just until they’re still slightly runny—think soft curds with liquid streaks. When you fold them into the rice, the residual moisture helps bind the balls without making them dense. Overmixing turns them into a rubbery, sad paste. Trust me, I’ve made that mistake at 2 AM after a long night.
- PRESS THE BALLS FIRM: Wet your hands slightly before shaping the rice balls—it keeps them from sticking, but don’t go overboard. Pack each ball tightly; if it crumbles when you lift it, it won’t hold together in the oil. A good test: Roll one between your palms, and if it stays intact, you’re golden. Loose balls = broken dreams (and a greasy mess).
Dietary considerations for this recipe
Gluten-Free Adaptations
For gluten-free versions, replace the all-purpose flour with a 1:1 gluten-free flour blend like Bob’s Red Mill or King Arthur. Dust your work surface and the finished rice balls with this blend instead. The egg wrappers will still hold perfectly, and the crispiness won’t suffer. 💛
Vegetarian/Vegan Options
Swap the chicken for shredded tofu or mushrooms—both absorb the savory flavors beautifully. For vegan egg wash, use a mix of 1 tbsp cornstarch + 2 tbsp water per egg, brushed lightly before frying. The texture stays crispy, and the flavor remains rich.
Low-Carb/Keto
Replace the short-grain rice with cauliflower rice (finely riced and sautéed with garlic and soy sauce). The egg wrappers remain the same, and the filling stays flavorful. For extra crispiness, add 1 tbsp psyllium husk powder to the cauliflower mix to bind it better.
Allergen-Friendly
If nut allergies are a concern, skip the sesame oil in the rice and use avocado oil instead for frying. For egg-free versions, use chickpea flour batter (mix ½ cup chickpea flour + ½ cup water) to wrap the rice balls. Fry as usual—they’ll still be crispy and delicious! ✨
Protein Swaps
Need a protein boost? Try crumbled tempeh (marinated in soy sauce) or lentils (cooked with garlic and ginger). For seafood lovers, finely chopped shrimp works wonderfully—just cook them first to avoid overcooking during frying. The texture stays tender and flavorful.
Nutrition facts
Frequently asked questions
Can I use long-grain rice instead of short-grain?
Short-grain rice is ideal because it stays sticky and chewy when cooked—perfect for holding fillings. Long-grain rice will be firmer and may fall apart when wrapped. If you must use long-grain, try jasmine rice and cook it slightly underdone for better texture.
How do I prevent the rice balls from falling apart when frying?
Make sure your rice mixture is cool before assembling, and don't overstuff the wrappers. Press the edges firmly to seal, then chill the assembled balls for 30 minutes before frying. This helps the egg wrappers set better and keeps everything intact.
What's the best way to reheat leftover fried rice balls?
For crispiness, reheat in a 400°F (200°C) oven for 5-7 minutes on a wire rack. For a quick fix, fry again in 350°F (175°C) oil for 1 minute to restore the crispy crust. Avoid microwaving—they'll turn soggy.
Can I make these ahead of time?
Yes! Assemble the uncooked rice balls and refrigerate for up to 24 hours before frying. For freezing, shape them without frying, wrap individually in parchment, and freeze for up to 1 month. Fry straight from frozen—no thawing needed!
What's the secret to extra crispy wrappers?
Use room-temperature eggs and keep the egg wash thin. Fry in 375°F (190°C) oil for the last 30 seconds of cooking to get that golden, shatteringly crisp exterior. A wire rack for draining helps too—it lets air circulate.