
Main Courses
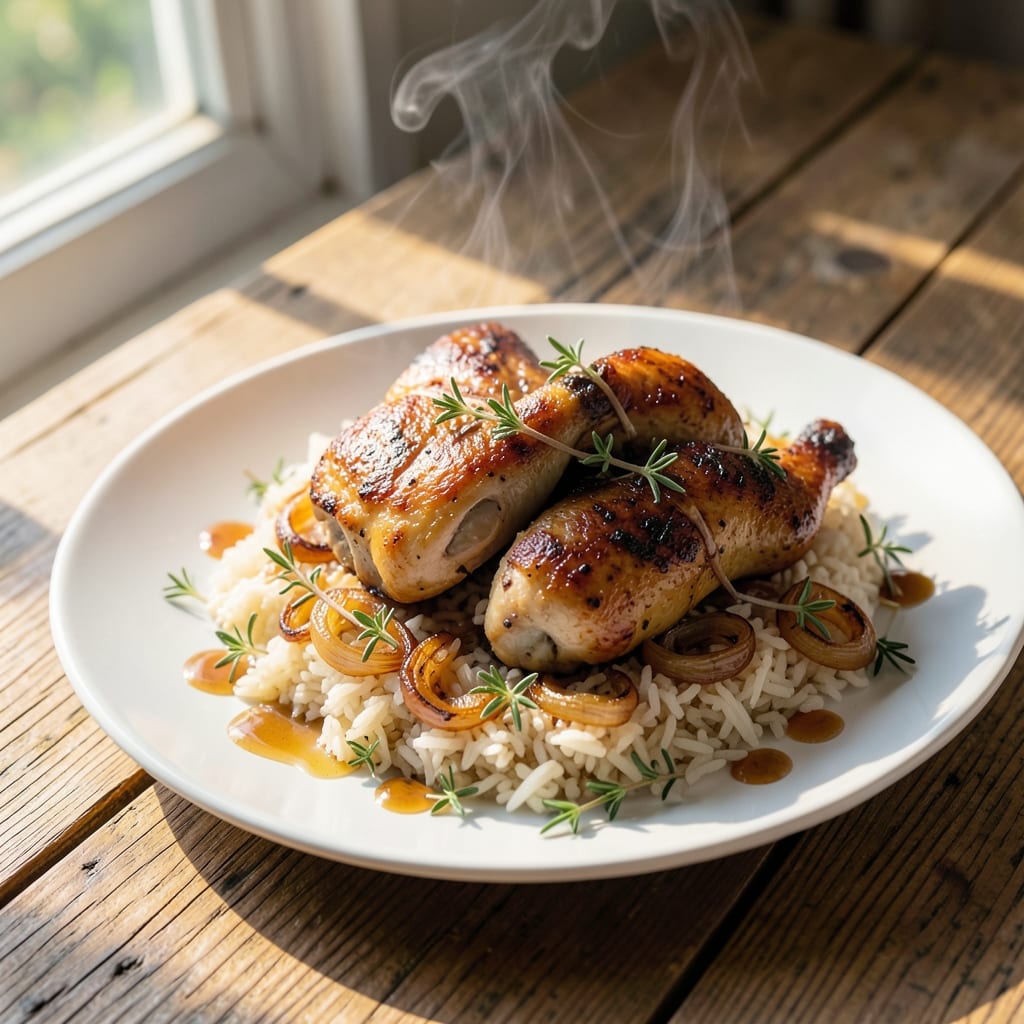
This one-pot chef's life chicken and rice recipe delivers restaurant-quality harmony in a single dish, combining tender chicken and perfectly seasoned rice with a rich herbed gravy. The secret lies in layering flavors through gentle braising and aromatic herbs, transforming simple ingredients into a comforting, chef-inspired meal that feels like a homecoming.
What sets this recipe apart is its foolproof one-pot method, where chicken thighs and long-grain rice simmer together in a fragrant broth infused with garlic, thyme, and bay leaves. The slow cooking process ensures the chicken becomes fork-tender while the rice absorbs all the savory juices, creating a dish that’s both elegant and effortless. No fancy techniques required—just patience and attention to timing.
The result is a golden, fragrant dish where each bite delivers perfectly cooked chicken, fluffy rice, and a velvety gravy that ties everything together. The herbed gravy adds depth, balancing the richness of the chicken with bright, aromatic notes that make this meal feel special without the fuss. It’s the kind of dish that tastes like it belongs on a dinner table, not just a weeknight.
Serve with a simple green salad or crusty bread to soak up every last drop of that flavorful gravy. This recipe is designed to impress while keeping the process simple—ideal for busy weeknights or when you want to cook like a chef without the complexity. Let’s get started.
Ingredients for a chef's life chicken and rice
The foundation of this chef-inspired dish lies in these 14 ingredients, carefully balanced for harmony in every bite.
| Ingredient | Amount | Notes |
|---|---|---|
| Chicken Thighs, Bone-In 🍗 | 1 ½ lb | Skin-on for richer flavor |
| Long-Grain White Rice 🍚 | 1 cup | Uncooked, jasmine or basmati preferred |
| Chicken Broth 💧 | 2 cups | Low-sodium preferred |
| Yellow Onion 🧅 | 1 whole | Diced, medium size |
| Garlic Cloves 🧄 | 4 cloves | Minced, fresh preferred |
| Fresh Thyme 🌿 | ¼ cup | Leaves only, stems removed |
| Fresh Rosemary 🌿 | ⅛ cup | Chopped, or 1 sprig |
| Bay Leaves 🍃 | 2 whole | Dried, standard size |
| Unsalted Butter 🧈 | 2 tbsp | Cold, cut into pieces |
| All-Purpose Flour 🌾 | 2 tbsp | For gravy thickening |
| Dry White Wine 🍷 | ½ cup | Substitute broth if needed |
| Salt 🧂 | 1 ½ tsp | Kosher or sea salt |
| Ground Black Pepper 🌶️ | ½ tsp | Freshly ground preferred |
| Fresh Parsley 🌿 | ⅛ cup | Chopped, for garnish |
The chicken thighs are the heart of this recipe—bone-in, skin-on for maximum flavor and moisture. Look for thighs with good marbling at the grocery store, usually in the meat case near the chicken breasts. If you can't find bone-in, use boneless thighs but add an extra 10 minutes to cooking time. For the rice, jasmine or basmati are ideal—they stay separate and don't turn mushy. The broth should be low-sodium to control the seasoning, but you can always adjust later. Fresh herbs make all the difference here, so if you're using dried, reduce to one-third the amount. Whole Foods or local markets often have the freshest thyme and rosemary.
No white wine? Use extra chicken broth—just add a splash of lemon juice for brightness. Fresh herbs wilting? Dried thyme and rosemary work at one-third the amount. For the flour, King Arthur or Bob's Red Mill brands are reliable choices. If you're short on time, pre-minced garlic from the jar works fine, though fresh has better flavor. The butter should be cold when added—this prevents the gravy from breaking. For a deeper flavor, consider adding a pinch of smoked paprika to the rice while cooking. The bay leaves are non-negotiable—they add that subtle earthy depth that makes this dish taste like a restaurant.
This dish tastes even better the next day as the flavors meld together. Store leftovers in an airtight container for up to 4 days in the fridge. For longer storage, freeze portions for up to 3 months. The gravy thickens as it cools, so reheat gently with a splash of broth if needed. To serve, garnish with fresh parsley right before eating—it adds a pop of color and freshness. The rice will be perfectly cooked when all the liquid is absorbed, but if you prefer it moister, add a splash of broth at the end. This recipe scales beautifully—double the ingredients for a crowd, just increase cooking time by 15-20 minutes.
Why You'll Love This Recipe
- One-Pot Magic: I swear by this recipe because it’s literally one pot. Toss in the bone-in chicken thighs, rice, broth, and diced onion—no chopping like a maniac—and let it simmer. The bones infuse flavor while you sip wine (or coffee) and pretend you’re not cooking.
- Garlic Bomb Flavor: That crispy, golden edge on the chicken thighs? Chef’s kiss. The garlic cloves get toasted in the pan first, then the onions caramelize just enough to stick to the rice like a dream. Between us, it’s the kind of dish that makes you want to lick the plate.
- Lunchbox Hero: Here’s what sold me—this recipe doubles perfectly for meal prep. The rice stays fluffy for days, and the chicken stays juicy even reheated. Pack it in containers, and suddenly you’re the office hero who brings lunch and saves everyone money.
- Budget-Friendly Feast: Bone-in chicken thighs stretch further than breasts, and long-grain rice is cheap. Add a bag of frozen veggies (or whatever’s on sale) and you’ve got a filling, hearty meal that costs less than takeout. My wallet thanks me every time.
Step-by-step instructions for one-pot chicken and rice with herbed gravy
This method delivers restaurant-quality flavor while keeping everything simple in one pot.
Sear the Chicken Thighs for Deep Flavor
Heat a large, heavy-bottomed pot over medium-high heat until hot. Add the 1.5 lb chicken thighs, bone-in, skin-side down, leaving space between pieces. Let them sear undisturbed for 5-6 minutes until the skin turns deep golden brown and crispy.
This initial searing creates a flavorful crust that infuses the entire dish. Flip the thighs skin-side up and continue cooking for another 3-4 minutes until they're golden on both sides. Remove the chicken and set aside on a plate, leaving all the rendered fat in the pot.
Build the Aromatic Base with Onion and Garlic
In the same pot, add the diced yellow onion and cook for 4-5 minutes until softened and beginning to caramelize at the edges. Stir occasionally to prevent burning. Add the minced garlic cloves and cook for an additional 30 seconds until fragrant.
Here's where the herbs come into play: Add the 0.25 cup fresh thyme, 0.125 cup fresh rosemary, and 2 whole bay leaves. Stir everything together and cook for 1 minute until the herbs release their aromatic oils. This herb blend forms the flavor foundation of the dish.
Deglaze and Combine with Rice and Broth
Pour in the 0.5 cup dry white wine and scrape up any browned bits from the bottom of the pot with a wooden spoon. This deglazing step captures all the flavor you've built so far. Let the wine simmer for 1-2 minutes until mostly evaporated.
Add the 1 cup long-grain white rice, stirring to coat the grains with the wine and herb mixture. Pour in the 2 cups chicken broth, then return the chicken thighs to the pot, skin-side up. Bring everything to a gentle boil, then immediately reduce heat to low.
Simmer Until Rice is Tender and Chicken is Perfect
Cover the pot and simmer for 25-30 minutes, maintaining a gentle simmer rather than a rolling boil. Check after 20 minutes - the rice should be tender but still have a slight bite, and the chicken should be cooked through with an internal temperature of 165°F.
If the liquid seems insufficient, add ¼ cup water to prevent the rice from drying out. The chicken thighs should be falling off the bone tender while maintaining their shape. The rice should be fluffy with just a hint of firmness in the center.
Finish with Butter and Flour for Rich Gravy
Remove the chicken thighs from the pot and set aside on a cutting board. In the same pot, increase heat to medium and add the 2 tbsp unsalted butter and 2 tbsp all-purpose flour. Stir constantly for 1-2 minutes until the mixture forms a smooth paste and becomes fragrant.
Slowly ladle in ½ cup of the cooking liquid from the pot, whisking constantly to create a roux. Return the mixture to the pot and simmer for 3-4 minutes until the gravy thickens to your desired consistency. Season with 1.5 tsp salt and 0.5 tsp ground black pepper.
Garnish and Serve with Fresh Herbs
Return the chicken thighs to the pot and spoon the herbed gravy over the top. Sprinkle with 0.125 cup chopped fresh parsley for a pop of color and freshness. Let everything sit together for 2-3 minutes so the chicken absorbs the flavorful gravy.
Serve immediately with the gravy spooned over the top. Each bite should deliver perfectly tender chicken, fluffy rice, and rich, herbed gravy in perfect harmony. The one-pot method ensures all the flavors meld together beautifully while keeping cleanup to a minimum.
Pro Tips For Making A Chef'S Life Chicken And Rice
- CRISP THE THIGHS FIRST: Skip the raw chicken straight into the pot—pat those thighs bone-dry and sear them skin-side down in a hot pan for 8-10 minutes until the skin turns golden and crispy. I used to rush this, and the dish always tasted flat; now it’s the thing that makes the whole thing sing.
- SWEAT THE ONIONS LOW: Don’t rush the onion and garlic step—cook them on medium-low for 10 minutes until they’re soft and translucent, not browned. After burning three batches, I finally figured out that patience here means the broth won’t taste like it’s fighting for flavor later.
- USE A 1:2 RATIO FOR RICE: Measure your rice before adding broth—1 part rice to 2 parts liquid guarantees fluffy grains without gummy mess. I was skeptical until I tried it; now I double-check because nothing ruins the dish faster than soggy rice.
- SAVE THE BROTH FAT: After simmering, skim the thick foam off the top of the broth and set it aside—it’s pure flavor. Stir it back in at the end for a richer, more aromatic finish. Sounds weird, but it works: the dish tastes like it’s been simmering for hours, not 45 minutes.
Essential equipment for a chef's life chicken and rice
Heavy-Bottomed Pot
Your choice of pot makes all the difference in this recipe. I swear by a 5-6 quart Dutch oven like the Le Creuset Stoneware or All-Clad Stainless Steel—they distribute heat evenly and prevent scorching. The deep sides help with the one-pot method, while the heavy base ensures steady simmering. If you don’t have a Dutch oven, a large stainless steel pot with a tight-fitting lid works too. Just avoid non-stick—it can’t handle the high heat needed for searing. 🔥
Wooden Spoon
A heat-resistant wooden spoon (I use Oxo Good Grips) is essential for stirring the rice and scraping up flavorful browned bits during deglazing. Wood won’t react with acidic ingredients like wine or broth, and it’s gentle on your pot. Avoid metal spoons when stirring the rice—it can tear the grains. For the gravy, a silicone spatula helps scrape every last drop from the pot.
Instant-Read Thermometer
This is a game-changer for perfect chicken every time. An instant-read thermometer like the ThermoWorks ThermoPop lets you check the internal temperature without cutting into the thighs. Aim for 165°F—any lower, and you risk dry chicken. I also use it to monitor the pot’s temperature during simmering to ensure even cooking. No thermometer? Use the "finger test"—press gently; if it feels firm, it’s done. ⏰
Fine-Mesh Strainer
A fine-mesh strainer (like OXO Good Grips) comes in handy if you want to strain the gravy for a smoother texture before serving. It also helps remove any herb stems or bay leaves that might make the dish bitter. For extra clarity, I sometimes press the strained gravy through a cheesecloth-lined strainer—it’s worth the effort for a restaurant-quality finish.
Chef’s Knife and Cutting Board
Sharp tools make prep a breeze. A high-quality chef’s knife (I recommend Wüsthof or Shun) and a non-slip cutting board (like John Boos Maple) are musts for dicing onions and mincing garlic efficiently. Dull knives are dangerous and make prep frustrating. For the herbs, a pair of kitchen shears works great for chopping fresh thyme and rosemary stems. 🌿
Whisk for Gravy
A balloon whisk (like Mercer Culinary) is perfect for creating a smooth, lump-free gravy. Whisking the butter and flour into a roux ensures a silky texture. If you don’t have a whisk, a fork works in a pinch, but it’s less effective. For extra richness, I sometimes finish the gravy with a splash of heavy cream—just whisk it in gently at the end. The key is patience; rush it, and you’ll end up with lumps. ✨
Nutrition facts
Frequently asked questions
Can I use chicken breasts instead of thighs for this recipe?
While you can substitute chicken breasts, thighs are ideal for this dish because they stay moist and tender during the long simmering process. If you prefer breasts, use 1 lb of boneless, skinless breasts and reduce cooking time to 15-20 minutes (they cook faster). For best results, pound them to an even thickness before cooking to ensure even doneness.
What type of rice works best for this one-pot chicken and rice?
Long-grain white rice like jasmine or basmati is perfect because it stays separate and fluffy. Short-grain rice (like sushi rice) will turn mushy, and brown rice requires a longer cooking time. For a quicker version, you can use instant rice, but it won’t have the same texture or depth of flavor. The key is using 1 cup uncooked rice for this recipe.
How do I prevent the rice from drying out during cooking?
Keep the liquid at a gentle simmer, never a rolling boil, and maintain a low heat setting. If the pot dries out before the rice is done, add ¼ cup water or broth and cover tightly. The lid should fit snugly to trap steam. For extra insurance, place a damp paper towel under the lid to create a seal. This method ensures the rice absorbs just the right amount of moisture.
Can I make this recipe ahead of time?
This dish tastes even better the next day as the flavors meld together. Store leftovers in an airtight container in the fridge for up to 4 days. Reheat gently on the stove with a splash of broth or water to restore moisture. For longer storage, freeze portions for up to 3 months. The gravy may thicken when reheated, so stir in a little extra liquid if needed.
What can I serve with this chicken and rice dish?
A simple green salad with a light vinaigrette balances the richness of the dish beautifully. For extra flair, add roasted vegetables like asparagus or Brussels sprouts. Crusty bread or dinner rolls are perfect for soaking up the herbed gravy. For a complete meal, consider adding a side of steamed green beans or a simple tomato salad with fresh basil.