
Main Courses
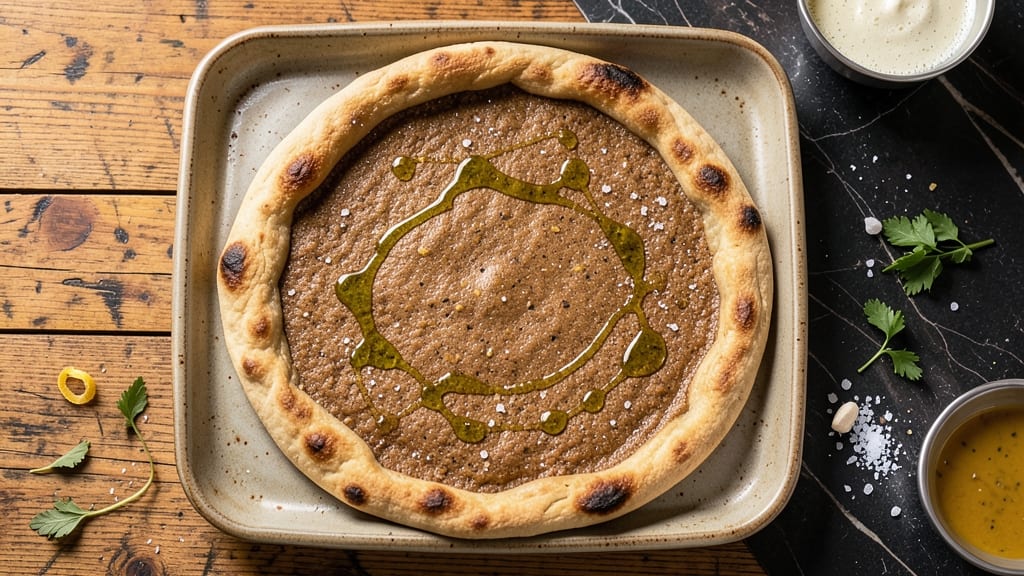
This brown rice flour pizza dough recipe delivers the perfect balance of crispy edges and chewy centers—all without gluten. 🌟 The secret lies in aquafaba (chickpea brine) as a binder, creating a sturdy yet tender dough that holds toppings beautifully.
I developed this after years of experimenting with gluten-free alternatives, and it finally rivals traditional pizza dough in texture and flavor.
What sets this recipe apart is its crispy-yet-flexible crust, achieved through precise hydration and a touch of olive oil for richness. The dough proofing is simplified for beginners, yet yields a restaurant-worthy result.
Whether you're vegan, gluten-free, or simply craving a lighter pizza base, this dough transforms any meal into a satisfying experience.
Ingredients for brown rice flour pizza dough
Gluten-free essentials meet plant-based innovation for a pizza crust that rivals traditional dough.
| Ingredient | Amount | Notes |
|---|---|---|
| Brown Rice Flour 🌾 | 2 ½ cups | Finely milled, gluten-free preferred |
| Aquafaba 🥜 | ½ cup | Chickpea brine, unsalted |
| Extra-Virgin Olive Oil 🫒 | ¼ cup | Cold-pressed, fruity variety |
| Granulated Sugar 🍯 | 1 tbsp | Organic preferred |
| Active Dry Yeast 🍞 | 1 tsp | Fresh yeast at 2x amount |
| Fine Sea Salt 🧂 | 1 ½ tsp | Diamond Crystal preferred |
| Cold Water 💧 | ½ cup | Chilled for optimal hydration |
| Vegan Butter 🧈 | 2 tbsp | Miyoko's or Earth Balance |
| Ground Black Pepper 🌶️ | ¼ tsp | Freshly cracked |
| Dried Basil 🌿 | 1 tsp | Organic preferred |
| Dried Oregano 🌿 | ½ tsp | Mediterranean blend |
| Semolina Flour 🌾 | ¼ cup | For dusting, optional |
The brown rice flour is non-negotiable for that signature chewy texture—Bob's Red Mill or Anthony's brands deliver consistent quality. For aquafaba, Trader Joe's canned chickpeas work perfectly, but save the brine for this recipe. The extra-virgin olive oil should have a peppery finish; California Olive Ranch or Colavita are reliable choices. Yeast is best bought fresh from the refrigerated section—it activates more reliably than active dry. Store all dry ingredients in airtight containers to prevent moisture absorption, which can compromise texture.
No aquafaba? Flax eggs (1 tbsp ground flaxseed + 3 tbsp water) work as a binder, though texture may differ slightly. Substitute vegan butter with coconut oil if needed, though flavor will shift. For the herbs, fresh basil is ideal but dried works at one-third the amount. The semolina flour is optional but creates that perfect crispy edge—Barilla is widely available. If your flour lacks protein, add 1 tbsp vital wheat gluten (certified gluten-free) for better elasticity, though this alters dietary compliance.
Store the dough in an airtight container with a damp towel for up to 3 days in the fridge. For longer storage, freeze portions wrapped in parchment—thaw overnight in the fridge before use. The proofed dough can be pre-rolled and frozen for 2 months, though texture may soften slightly. For best results, use within 24 hours of final proofing to maintain crispy edges and chewy centers.
Why You'll Love This Recipe
- No Yeast Hassle: The aquafaba (that’s chickpea brine) replaces yeast—no proofing, no waiting. I mix it up, let it rest 10 minutes, and roll it out. That’s it. No fussy rising schedule or failed attempts at kneading stiff dough.
- Nutty Crunch Edge: Brown rice flour gives this crust a subtle toasted nuttiness that regular pizza dough can’t match. The olive oil keeps it tender, but that crispy perimeter? Absolute magic. It’s like gluten-free meets artisanal.
- Leftover Reinvention: This dough freezes like a dream—just toss it in a bag, thaw overnight, and reheat. I’ve turned last night’s pizza into tomorrow’s breakfast flatbread or a quick lunch wrap. Zero waste, all flavor.
- Budget-Friendly Staples: You already have olive oil and sugar. Brown rice flour is cheap, aquafaba is free if you buy chickpeas, and yeast? A nickel’s worth. This is pizza for people who’d rather spend money on toppings than flour bags.
Step-by-step instructions for gluten-free pizza dough
This gluten-free dough delivers crispy edges and chewy centers using simple techniques.
👨🍳 Step 1: Activate the Yeast with Aquafaba
In a small bowl, whisk together the 0.5 cup aquafaba, 1 tbsp granulated sugar, and 0.5 cup cold water. The sugar helps activate the yeast while the aquafaba provides structure without gluten. Add the 1 tsp active dry yeast and let it sit for 5-10 minutes until frothy—you'll see small bubbles forming on the surface.
I always test the yeast first by dropping a bit of the mixture into warm water. If it floats, the yeast is active and ready. If it sinks, your dough won't rise properly, and you'll need to start over. This step is non-negotiable for proper texture.
🍳 Step 2: Mix the Dough Base
In a large mixing bowl, combine the 2.5 cups brown rice flour, 1.5 tsp fine sea salt, 0.25 tsp ground black pepper, 1 tsp dried basil, and 0.5 tsp dried oregano. Whisk to distribute the seasonings evenly through the flour. Create a well in the center and pour in the yeast mixture along with the 0.25 cup extra-virgin olive oil and 2 tbsp vegan butter.
Using a wooden spoon or dough whisk, gradually incorporate the wet ingredients into the flour until a shaggy dough forms. The brown rice flour will be sticky, so don't worry if it doesn't look like traditional dough. The aquafaba helps bind everything together without gluten. Mix for 3-4 minutes until the dough comes together but remains slightly tacky.
⏰ Step 3: Knead and Rest the Dough
Turn the dough onto a lightly floured surface (use the 0.25 cup semolina flour if needed) and knead gently for 5 minutes. The goal isn't to develop gluten but to distribute the ingredients evenly. The dough should be smooth but still slightly sticky—this is normal with gluten-free flours. Shape it into a loose ball and place it in a lightly oiled bowl.
Cover the bowl with a damp towel and let the dough rest at room temperature for 1 hour. This resting period allows the aquafaba to fully hydrate the flour and the yeast to work its magic. I know it seems long, but this step prevents dense, gummy pizza crust. The dough should nearly double in size and feel slightly puffy when ready.
🔥 Step 4: Shape and Pre-Bake the Dough
Preheat your oven to 425°F with a pizza stone or inverted baking sheet inside. On a lightly floured surface, gently press the rested dough into a 12-inch round (about ½-inch thick). The edges should be slightly thinner than the center—this creates those coveted crispy edges while keeping the middle chewy. Transfer the dough to parchment paper for easy handling.
Bake the crust for 8-10 minutes until the edges are golden brown and the center feels firm to the touch. It won't be fully cooked yet—that happens when you add toppings. The pre-bake sets the structure so your toppings don't create a soggy mess. Watch carefully after 6 minutes—gluten-free dough burns faster than traditional dough.
🍕 Step 5: Finish with Toppings and Bake
Remove the crust from the oven and immediately add your sauce and toppings, working quickly. The residual heat will help the toppings adhere. Return to the oven and bake for another 10-12 minutes until the cheese is bubbly and golden and the crust edges are deeply crispy. The center should still have a slight give when pressed—this indicates perfect doneness.
Let the pizza rest for 2-3 minutes before slicing. The crust will firm up slightly as it cools, but it should remain crispy at the edges. Serve immediately while the cheese is still molten and the crust is at its peak texture. This dough holds up well for leftovers, but the first slice is always the best.
Pro Tips For Making Brown Rice Flour Pizza Dough
- WHISK AQUAFABA FIRST: Brown rice flour dough needs a smooth, fully emulsified aquafaba base—otherwise, your crust will crack like a brittle biscuit. Whisk the aquafaba with sugar before adding yeast; this dissolves the sugar faster and kickstarts fermentation. I learned this the hard way after a dough that looked like it had been through a blender.
- WEIGH THE FLOUR: Brown rice flour is deceptive—it packs differently than all-purpose. Scooping leads to dry, tough dough. Use a kitchen scale for precision; aim for 250g flour per batch. (Yes, even if the recipe says "1 cup"—cups lie with dense flours.)
- LET YEAST BREATHE: Skip the plastic wrap—cover the dough bowl with a damp towel instead. Trapped condensation makes the dough gummy, and brown rice flour absorbs moisture like a sponge. A loose, breathable barrier keeps the yeast happy without overhydrating.
- CHILL THE DOUGH: This isn’t optional—it’s the thing that matters most. After kneading, refrigerate the dough for at least 2 hours (overnight is better). Cold slows gluten formation, so your crust stays tender and doesn’t turn into a chewy brick. (I know, I know—you’re eager to bake. Just wait.)
Common mistakes when making your brown rice flour pizza dough
Over-Mixing the Dough
Gluten-free brown rice flour dough has zero tolerance for over-mixing. Unlike traditional pizza dough, you can't knead this until it's smooth—it'll turn gummy and dense. Stop mixing as soon as the dough comes together (about 3-4 minutes) and let the aquafaba work its magic during the 1-hour rest.
I've ruined countless batches by kneading too long, so trust the process and resist the urge to "fix" it by adding more flour. 🍞
Skipping the Resting Period
That 1-hour rest is non-negotiable for texture. Without it, your crust will be dense and chewy in all the wrong ways. The aquafaba needs time to fully hydrate the flour, and the yeast needs to activate properly.
I once tried skipping this step for a quick dinner and ended up with a brick-like pizza. Set a timer and let the dough do its thing—your patience will be rewarded. ⏳
Using Warm Ingredients
Cold water and yeast are essential for proper activation. If you use warm water or ingredients straight from the fridge without chilling, you'll over-proof the dough before it even goes in the oven. Always use cold water and let your yeast mixture sit in a cool spot until it's frothy.
I learned this the hard way when my dough rose too quickly and collapsed in the oven. 🌡️
Ignoring the Pre-Bake
Adding toppings to an uncooked crust is a recipe for soggy disappointment. The 8-10 minute pre-bake sets the structure so your sauce and cheese don't create a watery mess. I've seen too many gluten-free pizzas where the crust turned into a soggy boat.
Keep an eye on it after 6 minutes—gluten-free dough burns faster than traditional dough. 🔥
Overloading with Toppings
This dough is sturdy but not indestructible. While it can handle a good amount of toppings, piling on too much will weigh it down and prevent proper browning. I recommend starting with a ½ cup sauce base and 1-2 cups toppings max.
If you're craving a loaded pizza, consider making two smaller crusts instead of one overstuffed mess. 🍅
Not Adjusting Oven Temperature
Gluten-free dough requires precise temperature control. If your oven runs hot or you're using a pizza stone, you may need to reduce the temperature to 400°F instead of 425°F. I've had crusts burn before they were fully cooked because gluten-free dough doesn't have the same protective structure.
Use an oven thermometer to verify your oven's actual temperature—many home ovens are off by 25°F or more. 🌡️
Nutrition facts
Frequently asked questions
Can I make this dough without aquafaba?
Yes! Use 1 tbsp ground flaxseed mixed with 3 tbsp water as a substitute—this creates a flax \"egg\" that binds the dough similarly. Let it sit for 5 minutes to thicken before using. The texture will be slightly denser but still workable for pizza. For extra crispiness, add 1 extra tbsp brown rice flour to compensate.
Why does my dough taste bitter?
Brown rice flour can develop bitterness if stored improperly or if the yeast isn't fully activated. Always use fresh yeast and store flour in an airtight container away from light. For extra flavor, add ½ tsp garlic powder or 1 tsp nutritional yeast to mask any bitterness while adding depth.
How do I adjust this for a thinner crust?
Roll the dough to ⅛-inch thickness instead of ½-inch, and stretch it gently by hand after shaping. For extra crispiness, brush with olive oil before pre-baking. Reduce toppings to ½ cup sauce + 1 cup toppings max—less weight = thinner, crispier result. The edges will brown faster, so watch closely after 5 minutes in the oven.
Can I make this dough ahead of time?
Shape the dough into a ball, wrap tightly in plastic, and refrigerate for up to 3 days. For longer storage, freeze the shaped dough (unproofed) for 2 months. Thaw overnight in the fridge, then let it rest at room temperature for 1 hour before shaping and proofing. The texture remains excellent when prepped ahead.
What's the best way to reheat leftover slices?
Wrap slices in foil and warm at 350°F for 5-7 minutes to restore crispiness. For extra crunch, place in a skillet over medium heat for 1-2 minutes per side until golden. Avoid microwaving—it makes the crust soggy. Leftovers keep well for 3 days when stored in an airtight container.